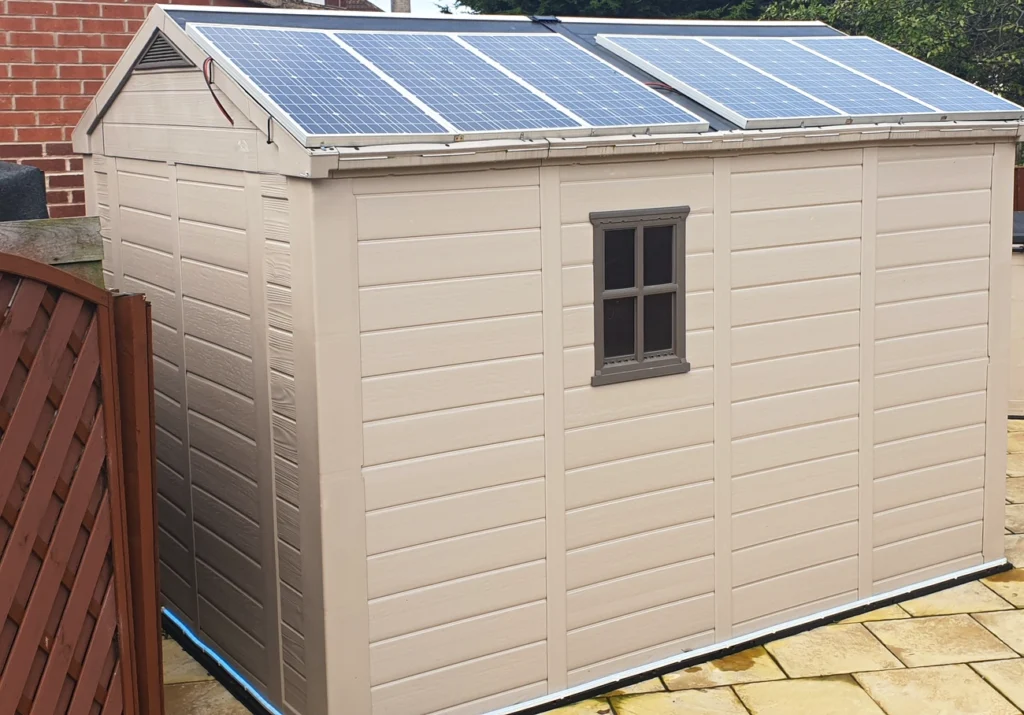
You can solar power a shed affordably and effectively. Most simple shed solar setups require just 200-400 watts of power, which powers LED lighting, charges batteries, and runs small devices. Solar systems for homes might seem expensive, yet solar shed solutions start at $500 for a small off-grid system.
Your specific needs determine the ideal solar setup for shed spaces. Storage sheds typically operate well with 100-400 watts of panel capacity. The installation process on your shed’s roof surfaces proves easier than expected. Most roof structures support some form of solar energy, which makes solar power solutions available to nearly everyone. The sun’s energy hits south-facing roofs most effectively throughout the year in the U.S..
This detailed guide shows you the essential steps to create a solar panel setup for shed spaces. You’ll learn about roof suitability assessment and ways to avoid common mistakes. The knowledge you gain will help you convert your storage shed into a functional, off-grid workspace efficiently.
Can Your Shed Roof Support Solar Panels?
You need to check if your shed’s roof can support solar panels before installation. Most shed roofs (approximately 95%) can handle the solar panels’ weight, which equals adding another layer of shingles. A full picture helps ensure safety and the best performance.
Check the roof structure and material
Your shed roof’s structural integrity matters a lot when installing solar panels. Watch out for sagging, water damage, or structural problems. You might need to repair or reinforce older roofs, especially those over 15-20 years old. The type of roofing material affects how easy it is to install panels. These materials work great with solar panels:
- Asphalt shingles
- Metal roofing
- Concrete tiles
- TPO and PVC (for flat roofs)
Wood shakes and slate tiles can be tricky because they’re brittle and might break during installation. You should ask a structural engineer to check if your shed needs extra support when you’re not sure about its strength.
Understand roof orientation and shading
Your shed roof’s direction affects how well solar panels work. South-facing roofs in the northern hemisphere get the most sunlight throughout the day. East or west-facing roofs work too, but they might produce 15% less energy. The Department of Energy says panels can face up to 45 degrees east or west of due south without losing much power.
Shade can hurt panel performance. Trees, buildings, or roof features like chimneys can block sunlight and reduce output. A good shade analysis helps spot potential problems before installation.
Evaluate roof type: pitched, flat, or curved
Your shed roof’s angle makes a big difference in how well solar panels work. Panels usually work best at angles between 30-45 degrees. The ideal angle matches your geographical latitude. Flat roofs need special mounting systems to get the right tilt. Roofs steeper than 40 degrees might be harder to work with.
The Department of Energy suggests a 15-40 degree tilt for pitched roofs to get the best results. Most home roofs fall right in this sweet spot, usually between 18-34 degrees.
Choosing the Right Solar Power Setup for Your Shed

Your shed’s specific needs, location, and budget play a key role in choosing the right solar power system. Let’s look at what options you have.
Off-grid vs grid-tied systems
Off-grid solar systems work without connecting to the utility grid. You’ll need solar panels, good battery storage, and sometimes a backup generator. These systems work great for remote spots without power lines and let you live completely off the grid. The price tag runs higher, though, between $50,000 and $65,000 on average. Living off-grid means you’ll need to watch your power use since you can only use what your system makes.
Grid-tied systems link up to the power grid, so you can use both solar and regular power. They cost less upfront and give you better value because they need fewer parts. The downside is you can’t use them during blackouts. These systems shine in places with full retail net metering, where you get credits for extra power you make.
Estimate your daily power needs
You should figure out how much energy your shed needs before buying equipment:
- LED lights in a simple storage shed: A 12V 50W solar panel usually does the job
- Extra bright lighting: A 100W panel might work better
- Backyard office space: About 3000W to 4000W
- Workshop with power tools: You’ll need 4000W-5000W or more
Make a list of your devices, multiply their power use by daily hours, and add it all up. It’s smart to aim a bit high to make sure you have enough power on cloudy days.
Avoid oversizing your solar setup for a shed
People often make their systems bigger than needed. A 5kW system can power a 1500 sq. ft. house and runs about $10,750. Most small sheds work fine with just 200-400 watts of solar power.
A basic 200W solar panel kit might cost under $300, plus $200-$800 for batteries. Your shed’s purpose decides the right size – whether it’s just storage or a full workshop.
Your roof’s weight limit and space matter when you plan your solar setup. Small installations with 2-3 panels can be mounted securely using simple Z-brackets.
Installing Solar Panels on a Shed Roof: Step-by-Step
A solar system setup for your shed needs good planning and precise work. You’ll find the process easier than you might expect.
Plan your panel layout
Your panels need the best position to catch maximum sunlight—they should face south if you live in the Northern Hemisphere. Small sheds that fit two or three panels need space calculations based on standard 5′ x 3′ panel sizes. Your layout must work around roof obstacles and leave enough room between panels.
Mount brackets and rails securely
Pitched roofs work best with Z-brackets or the mounting hardware from your solar kit. Waterproof connectors must seal all mounting points to stop leaks. Flat roofs need tilt mounts that set panels at the optimal 30-45 degree angle.
Install and wire the solar panels
Your panels should attach to the mounting system according to the manufacturer’s guidelines. The system’s voltage requirements determine whether you connect panels in series or parallel using weatherproof MC4 connectors.
Connect the charge controller, battery, and inverter
These components belong on your shed’s interior wall, preferably in a dedicated power center. The connections need proper polarity—positive matches positive, negative matches negative.
Ensure safe cable routing and grounding
UV-resistant conduit protects your cables from weather damage. A proper grounding system shields against electrical surges. The system’s grounding should link to your main ground connection.
Permits, Costs, and Common Mistakes to Avoid

You need to understand legal requirements and costs to make your solar power project for your shed successful.
Do you need a permit for your solar panel setup for a shed?
Your system configuration determines the permit requirements. Small off-grid solar kits usually don’t need construction permits. But connecting your shed to the main grid requires proper permitting. Many municipalities demand both building and electrical permits even for auxiliary structures like sheds. Your local building department should be your first stop since requirements vary by location.
DIY vs professional installation costs
You can save about 10% with DIY solar installation compared to professional work. A simple 200W solar panel kit that powers lights and charges tools costs under $300, plus $200-$800 for battery storage. Professional installation costs much more—labor makes up 10% of the $15,000-$25,000 average system price. The total cost for shed solar systems ended up ranging from under $1,000 for simple setups to $11,000 for high-power installations.
Top 5 mistakes beginners make with solar sheds
- Using AC-rated circuit breakers on DC lines creates a serious fire hazard
- Battery capacity doesn’t match the inverter’s needs
- Local permits and regulations get overlooked
- Connections and torque specifications aren’t done right
- Systems are unnecessarily oversized for shed applications
Yes, it is worth noting that professionals offer benefits beyond installation. They provide equipment warranties, financing options, and peace of mind.
Conclusion
Solar power for your shed is a great way to try renewable energy without spending big on a full home system. Most sheds work well with just 200-400 watts of solar capacity. This makes the project budget-friendly and easy to handle.
You’ll need to get a full picture of your shed’s roof strength, direction, and shade patterns first. South-facing roofs get the best sunlight. East or west-facing roofs also work with only a small drop in power production.
Your choice between off-grid and grid-tied systems depends on what you need and your budget. You should calculate your power needs carefully before buying equipment. Many beginners make their systems too big and end up spending too much.
The setup process follows clear steps that DIY fans can handle well. Each phase builds on the previous one as you plan your panel layout and connect the electrical parts.
Rules and permits are different in each area. Check with your local authorities before starting to avoid problems down the road. Doing it yourself saves about 10% compared to hiring pros. Professional installers do offer perks like warranties and expert knowledge.
Setting up solar power for your shed is a simple first step into clean energy. The right solar setup can turn a basic shed into an independent workspace while helping the environment. This guide gives you the knowledge to add eco-friendly power to your backyard building.


