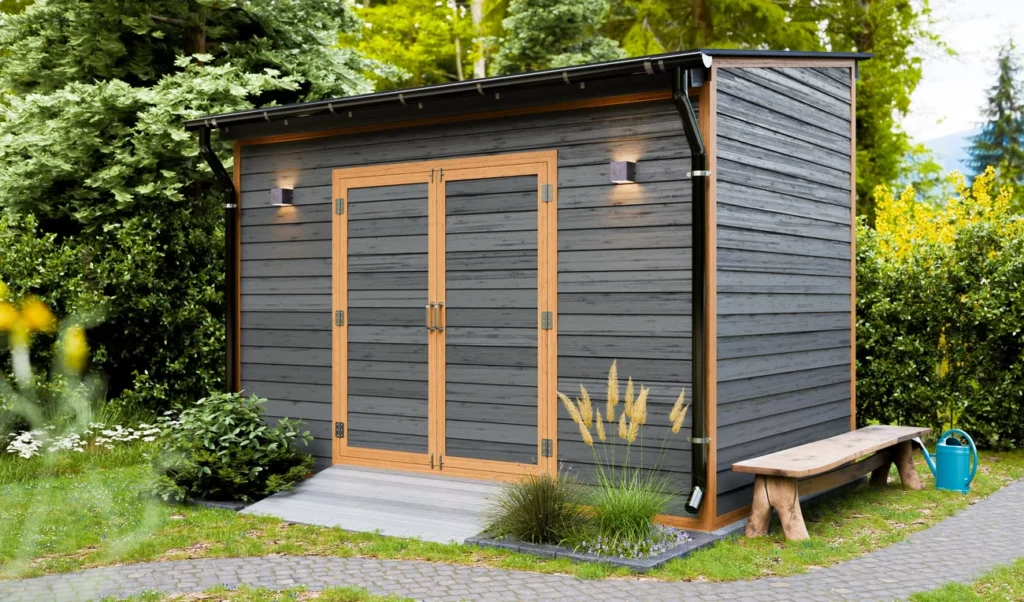
Building a lean-to shed completely changed my backyard storage setup and saved me thousands compared to pre-built options. I finished my 10×10 lean-to shed for just $2,610. Many people think this project needs weeks of work, but with good planning, you can complete it in a single weekend.
Lean-to sheds differ from regular four-walled structures. They have three walls with the fourth one attached to an existing structure. This design makes them ideal to maximize space against garages or homes. My shed has proven incredibly tough. It stood strong through a storm that dropped 14 inches of wet snow and holds about 20 face cords of wood every winter. This piece breaks down the process of building a lean-to shed into easy-to-follow steps. You’ll find everything here – from choosing the right foundation to building a lean-to roof with proper pitch that ensures good drainage and lasting durability.
Planning Your Lean-to Shed Build
Building a weekend lean-to shed project starts with good planning. Your project will run smoothly and last longer if you take time to prepare before picking up that hammer.
Check local building codes and permits
The first step is to ask your local building department about permit requirements. Most areas don’t require building permits for sheds under 200 square feet, though rules can vary substantially by location. To name just one example, some places exempt structures under 100 square feet, while others set the limit at 120 square feet.
Required permits usually need:
- A plot diagram that shows where your shed sits relative to property lines
- Elevation drawings or detailed plans
- Application fee (ranges from $50-$180 based on location)
Permit costs and consequences: Permit fees start around $70, but prices change depending on your location and shed complexity. Skipping needed permits could lead to daily fines up to $500. This might also create problems when you sell or refinance your home.
Choose the right location and size
The perfect spot for your lean-to shed depends on several key factors. These sheds need attachment to existing structures, so you’ll want to place yours against your garage, house, or barn wall.
Your best placement should:
- Use level ground with good drainage to avoid structural problems
- Make loading and unloading equipment easy
- Meet setback rules from property lines, which usually range from 10 feet to 100+ feet in sensitive areas
- Stay clear of utility lines – let local authorities mark underground services
Size matters too, and your needs should guide your choice. Lean-to sheds come in sizes from small 6×4 foot structures to bigger 10×10 foot designs. Note that smaller sheds (under 200 sq. ft.) face fewer restrictions.
Download or create lean-to shed plans
Quality plans can make your weekend project run smoothly instead of turning into a headache. Many websites give you downloadable plans with key details like material lists, cut lists, and step-by-step instructions.
Look for plans that include:
- A complete shopping list with recommended lumber sizes
- Detailed construction drawings with measurements
- Step-by-step building instructions
Some websites offer free plans, but premium plans are a great way to get more complete guidance with detailed directions. My experience shows that detailed plans save precious time during the building phase.
Building the Foundation and Base
A solid foundation will make your lean-to shed last for years. The site needs proper preparation, and you’ll find several foundation options that work well based on your needs.
Options: gravel pad, concrete blocks, or skids
A gravel pad works great as a foundation because water drains away from your shed. This helps prevent rot and moisture problems. I picked 4 inches of #57 crushed stone (clean stone or drainage stone) for my lean-to shed. This stone gives perfect drainage and even support.
Concrete blocks work best on sloped areas. They act like small foundations under support points and need less digging than other options. A skid foundation uses pressure-treated timbers on the ground with the floor frame on top. This simple design has worked well for generations.
Laying out and leveling the base
My first step was to clear the site of plants and debris. I used stakes and string to mark the edges and made sure the corners were square by measuring diagonals. The ground needed some work – I leveled high spots and filled low areas until everything looked even.
I put landscape fabric on the soil before adding gravel. This stops weeds from coming through, but lets water drain. The gravel went down in layers that I packed down really well. This creates a stable base that stays put.
Treating and assembling the floor frame
You need pressure-treated lumber for the floor frame because it fights off moisture and rot. The 2×6 joists I used can hold up to 53lbs per linear foot – plenty strong for storage.
I built the outer frame first after cutting the joists. The corners needed to be square before I put in the galvanized screws. Then I added interior joists every 16 inches to support the 3/4-inch plywood flooring.
I checked the level often and made fixes before final assembly. This extra care means my lean-to shed stands strong in any weather.
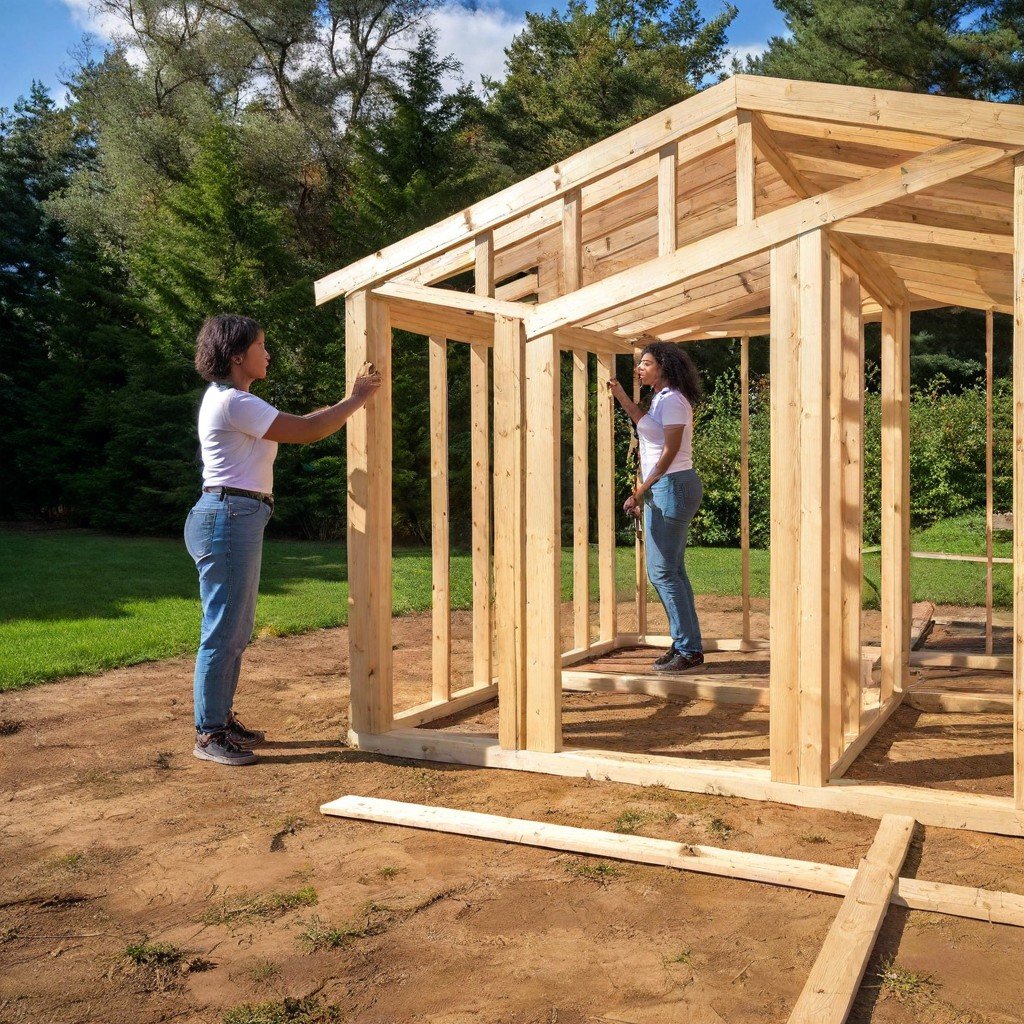
Framing the Walls and Roof
The walls and roof came next after setting up a solid foundation – maybe the most exciting phase of building my lean-to shed.
Building the back and side walls
Wall framing becomes quick work once you grasp the simple concepts. My walls used standard 2×4 lumber throughout, with a double top plate that added strength and connected the walls. The back and side walls stood at equal heights (about 7½ feet) in my lean-to design. The front wall’s different height created the characteristic slope.
I cut the studs to similar lengths and assembled each wall on the ground. The studs fit at 16-inch intervals that I marked with my tape measure. Each wall went up one at a time. I secured them to the floor and joined the corners with 2½-inch screws.
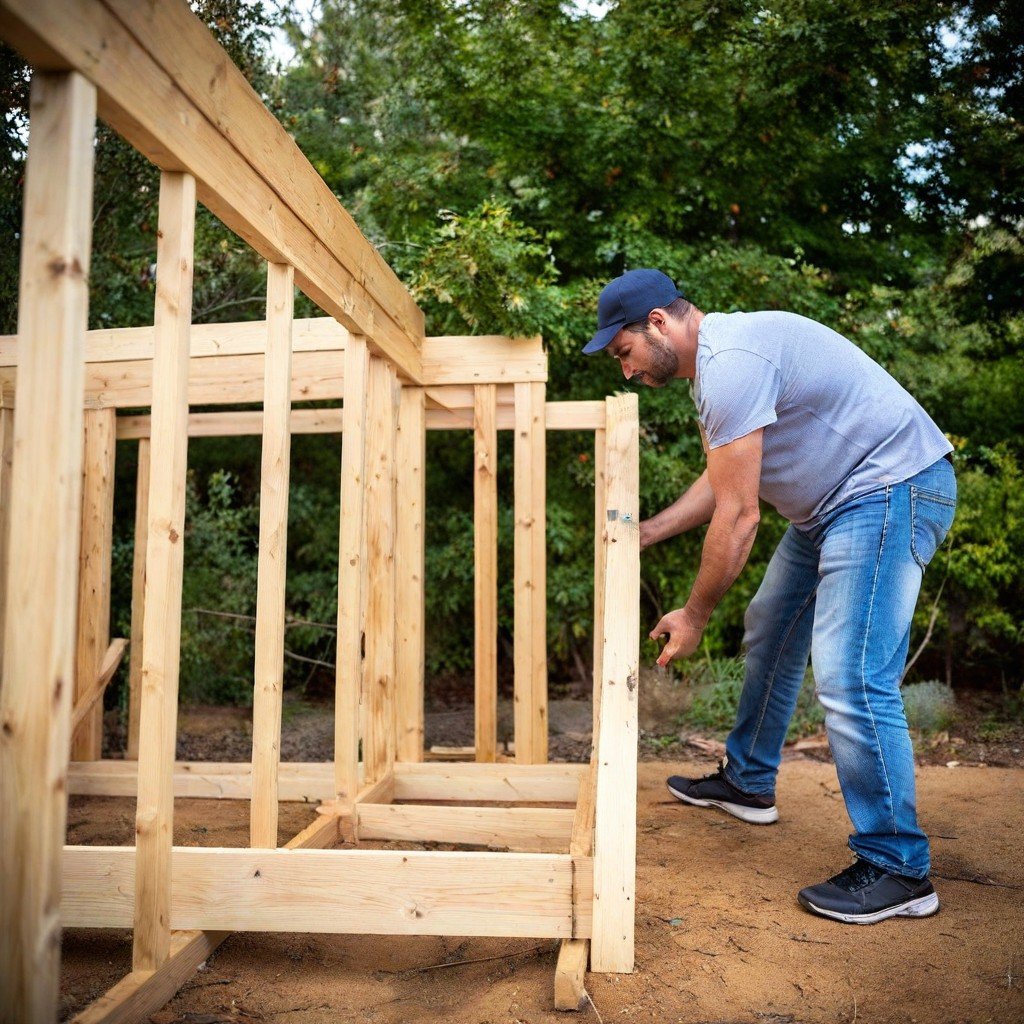
Creating a sloped roof structure
A lean-to shed gets its character from the sloped roof design. The front wall stood taller than the back, which gave me about a 1.5/12 pitch. Water runs off smoothly with this single-direction slope.
Builders of larger sheds should add a small extension wall on the taller side rather than using extra-long studs. This method strengthens the structure where the roof slope starts.
How to build a lean-to roof with proper pitch
The roof pitch affects drainage and your choice of materials. Asphalt shingles need a minimum pitch of 2/12 (or 9.46 degrees). The roof rises 2 inches for every 12 inches it runs horizontally.
You need these measurements to calculate pitch:
- Height difference between front and back walls
- Horizontal distance between walls
The pitch comes from dividing the height difference by the horizontal distance. I chose a medium pitch that made construction easier while ensuring good water runoff.
Installing rafters and roof supports
Rafters create your lean-to roof. I spaced 2×6 lumber rafters 24 inches apart on center. The rafters extended past the walls to create the desired overhangs.
The “birdsmouth” cuts proved crucial – these notches let rafters sit flush on wall top plates. Here’s how I made these cuts:
- I placed each rafter in position
- Made marks where it met the top plates
- Used a speed square to mark the angles
- Cut notches with a circular saw and jigsaw
Galvanized hurricane ties secured each rafter and provided excellent wind resistance. The roof structure is finished with fascia boards on the front and back, ready for roofing material.
Cladding, Roofing, and Final Assembly
The frame stands tall and ready. Let’s turn this skeleton into a functional storage space by adding siding, roofing, and final touches.
Attaching siding and wall panels
I picked LP Smart Siding panels that came pre-primed and paint-ready. My first step was to pre-paint the panels, which made the job easier, though you can install them raw and paint them later. A ledger board at the bottom helped line up the panels correctly. I secured them with galvanized nails every 8-12 inches into the studs. The panels’ designed lap joints made overlapping corners and edges simple. Each nail needed to go at least 1½ inches deep into the studs.
Cladding the roof and adding felt or shingles
Roofing needs a specific order to keep water out. The first step was attaching 7/16-inch plywood sheathing to the rafters. I left a ⅛-inch gap between sheets so they could expand. Metal drip edge went along the eaves, under the roofing felt, but over the fascia boards. After that, I used capped nails to secure the synthetic underlayment and added a drip edge to the rakes over the felt.
The shingle installation started with starter strips I cut from regular shingles along the tar strip. These went along the eave with a 3/8-inch overhang. The first full row of shingles went right over the starter strip. Each new row is offset by 6 inches, keeping water from running between joints. This pattern continued up to the ridge.
Installing the door and hardware
The door’s frame used 2×4 lumber with T1-11 siding on the front. A level door opening was vital before installing three heavy-duty hinges per door—center, top, and bottom. The hinges needed screws long enough to reach the framing studs. I swapped out the standard hinge screws for longer framing screws to make it more secure.
Adding trim and weatherproofing
Good trim work improves looks and provides vital protection. PVC trim’s resistance to rot made it perfect for corners, door openings, and windows. High-quality exterior caulk sealed all seams and joints where water might get in, especially where trim meets siding.
Z-flashing at horizontal seams added extra durability. A bead of caulk went under the flashing before securing it. The upper edge needed caulk, too, for a watertight seal. These finishing touches help your shed last longer and stand up to harsh weather.
Conclusion
A DIY lean-to shed will change how you look at backyard storage forever. In this piece, I want to share my journey of building a tough structure that stood up to brutal weather and gave me reliable storage space. The best part? It only cost me $2610 – way less than pre-built sheds that wouldn’t have matched my needs as well.
You can definitely finish this project in one weekend with good planning. We covered all the crucial steps – checking building codes, picking the right spot, setting a solid foundation, and proper framing. These steps are the foundations of a great build. You’ll get that extra storage space without spending weeks on construction.
The lean-to design beats traditional four-walled sheds hands down. You’ll use fewer materials since it connects to an existing wall, and you’ll make the most of that dead space against your home, garage, or barn. The sloped roof naturally pushes water away from your structure, which helps it last longer and keeps your stuff dry.
My lean-to shed has become a crucial part of my property. It holds approximately 20 face cords of wood every winter without any problems. It proved its worth during harsh weather – a massive 14-inch snowfall didn’t even make it flinch.
Clean corner trims and weatherproofed seams will make your shed last for years. These finishing touches might seem small, but they protect your shed from harsh weather a lot.
Want to build one yourself? Just grab your materials, block out a weekend, and follow along. Soon you’ll have a budget-friendly storage solution that fits your needs perfectly – built with your own hands.