Your workshop needs a proper dust collection setup as one of the most important investments. The smallest wood particles can cause serious lung damage, and you often can’t see them until they’ve entered your lungs. My years of experience have taught me that a system that works needs careful planning and the right components.
The dust collection system setup needs more than just a collector connected to your tools. A well-laid-out dust collection system should connect to all machines that produce dust and use blast gates to direct airflow where needed. You’ll need a unit with at least 2 hp and a minimum rating of 1,300 cfm to make your dust collector work properly. Cyclone collectors give better filtration and airflow than single-stage models.
My expertise in designing the quickest way to manage workshop dust follows in this piece. Rigid ductwork reduces friction three times more than flexible hose and dramatically improves your system’s performance. HEPA filters, which trap at least 99.97% of 0.3-micron particles, are vital to keep clean air in your workspace. These insights will protect your health and equipment, whether you’re building a new system or upgrading an existing one.
Planning Your Dust Collection Layout

A well-planned strategy forms the base of a working dust collection setup. You should create a scaled diagram of your workshop space before buying components or running ductwork. This crucial first step helps you find the best spots to place everything from the main collector to individual blast gates.
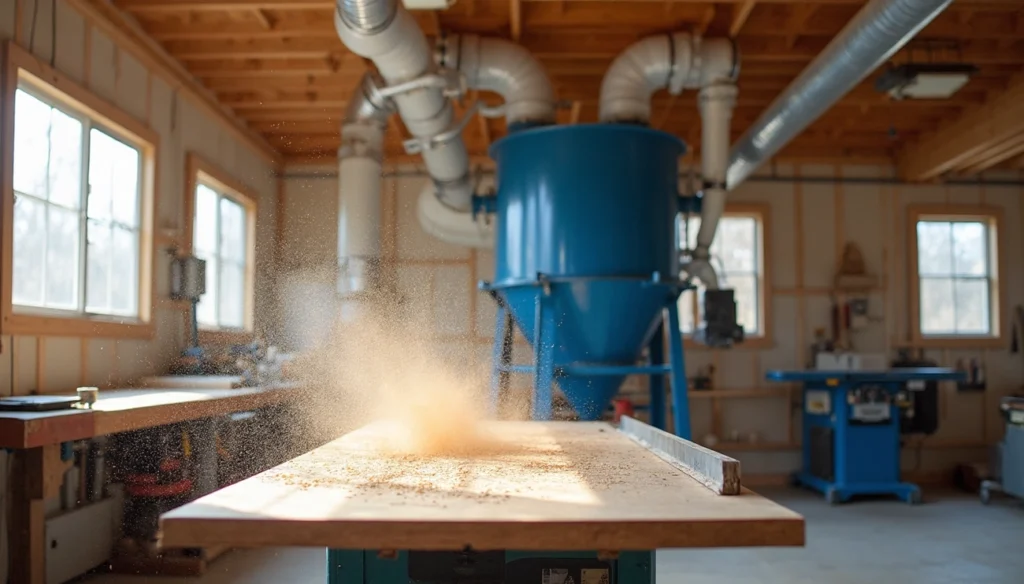
Positioning your dust collector for efficiency
Your dust collector works best when placed centrally within the duct layout instead of at one end. This setup reduces duct run lengths by a lot and boosts overall performance. We placed our collector near tools that make the most chips and need the strongest suction, usually the tablesaw and planer. This strategic placement cuts down ductwork needs and keeps air moving faster to collect dust and debris better.
Space-tight shops might benefit from a corner placement or an adjacent room setup. A smart approach puts the collector in a separate, insulated enclosure. This cuts noise and lets filtered air flow back into the workshop.
Designing duct runs with minimal resistance
Every foot of ducting adds friction and resists airflow. So, I plan layouts with the shortest possible duct runs and fewer turns. Air velocity drops and dust buildup risks increase with a single duct of 30′ or more that wraps around more than two walls.
Smooth transitions keep the airflow strong. Just like a car moves faster through a large-radius curve than a sharp corner, gentle direction changes help air maintain its speed. Wide-radius elbows work better than sharp turns, and you should keep machines needing the strongest airflow closest to the collector.
Choosing between overhead and floor-level ducts
Your workshop’s layout determines whether overhead or floor-level ducts work better. Overhead trunk lines stay clear of walking paths but need extra routing up and down. This adds length and creates more resistance.
Floor-level ducting pairs well with single-stage collectors that have low inlets. This method needs fewer vertical runs but might block work areas. Some woodworkers create the ultimate solution with sleeper floors. These have built-in trenches for dust collection lines that eliminate ductwork obstacles while keeping airflow efficient.
Your specific workspace and workflow should guide the balance between efficiency and practicality.
Choosing the Right Dust Collector
Dust collector selection requires understanding several technical specifications that determine collection efficiency. My years in the workshop have taught me that making the right choice ensures clean air consistently.
Understanding CFM and horsepower needs
CFM (cubic feet per minute) measures airflow rate and determines a dust collector’s ability to capture airborne particles. Most woodworking equipment needs between 250-1000 CFM. Average table saws, planers, and jointers typically require 300-600 CFM for effective dust removal. The system’s horsepower (HP) determines how well it maintains airflow under varying conditions.
CFM and HP’s relationship is vital—you want maximum CFM with minimum horsepower to keep energy costs down. Simple calculations show that most small shop tools need about 1000 CFM for fine dust collection, yet only 350 CFM suffices for simple chip collection.
Single-stage vs. cyclone systems
Single-stage collectors pull air straight into the collection area, where dust hits the filter immediately. These systems cost less and have a smaller footprint, but their performance drops as dust clogs the filters.
Cyclone systems use a cone-shaped body that separates dust from air before reaching the filter. This design helps cyclones perform consistently for longer periods. A properly designed cyclone can exceed 99% dust separation efficiency. This efficiency reduces filter cleaning frequency while maintaining steady airflow.
Sizing your collector for your shop
A 1 HP unit delivering 400 actual CFM works adequately when connected directly to individual tools. Your woodworking needs might grow more serious, and a ducting system will require more power.
Shops in a single garage stall with ducting need a 2 HP system with at least a 1,300 CFM rating. Larger workshops spanning a two-car garage space usually need an upgrade to a 3 HP system.
Manufacturer’s CFM ratings assume ideal conditions. The actual performance with filters and ductwork installed might be half the advertised number.
Optimizing Filtration and Air Quality

A dust collector loses its punch when fine dust simply recirculates back into your shop. My years of woodworking have taught me that good filtration makes all the difference. You might think your workshop looks clean, but breathing safely requires more than appearances.
Why HEPA filters matter
HEPA (High Efficiency Particulate Air) filters can capture at least 99.97% of particles measuring 0.3 microns. This isn’t just clever marketing – it’s the hardest particle size to catch. Larger and smaller particles get trapped even more easily. These tiny wood dust particles are really dangerous. They slip past your body’s natural defenses and end up deep in your lungs.
True HEPA filters work at peak efficiency right away. You don’t need to wait for them to build up a “filter cake” or get “seasoned.” This means you’re protected the moment you flip the switch, which really helps if you use your workshop occasionally.
Avoiding misleading filter labels
Watch out for marketing tricks like “HEPA-like” or “HEPA-style” – these filters won’t protect you like genuine HEPA filters. MERV (Minimum Efficiency Reporting Value) ratings can trick you too. Higher MERV ratings (13-16) might work great for HVAC systems, but they don’t tell the whole story for dust collectors:
- The airflow rates in MERV tests are nothing like real dust collector use
- They only show how well new filters work, not long-term performance
- Tests focus on filter material alone, ignoring the rest of the system
A dust collector’s filter needs to shed dust during cleaning cycles just as well as it catches it – something MERV ratings don’t measure.
Upgrading filters for better performance
Standard cloth bags? Think about switching to cartridge-style HEPA filters. They pack more surface area into a smaller space, which helps maintain strong airflow while filtering better. Look for filters with well-spaced pleats and non-stick coatings, too. They’re easier to clean and last longer between maintenance sessions.
Don’t wait for problems – replace filters when suction drops or pressure readings hit your manufacturer’s limits. This keeps your system running strong with proper airflow and filtration. Just make sure the new filters fit your collector correctly. The wrong size throws off the air-to-cloth ratio, which kills both suction and filtering power.
Ductwork, Connections, and Tool Integration
Your dust collection setup’s success depends on the quality of your ductwork and connections. My experience with installing many systems has taught me that material choices can make or break both performance and user satisfaction.
Types of ductwork: PVC, snap-lock, spiral
Each type of ductwork comes with its benefits. Snap-lock ductwork gives you a budget-friendly metal option that matches many dust collector inlets with its vital 5″ diameter. The price is right, but you’ll need to seal all joints with tape to stop leaks. The thin 26-gauge material tends to dent easily and might even collapse if you run the blower with all blast gates closed.
Spiral pipe stands out with its superior strength and dent-resistant construction. This tough option shines in systems over 5 hp. The smooth interior helps air flow better through the system.
PVC pipe might be popular, but it’s not the best choice for dust collection. We learned that it builds up static electricity, which can shock you pretty badly or create risks for people with pacemakers. On top of that, it’s almost impossible to find PVC in 5″ diameter, which limits what you can do.
Using blast gates and reducers effectively
Think of blast gates as traffic cops for your dust collection system. Without them, suction spreads evenly through all open ports and is nowhere near as effective. The best setup needs gates at each extraction point. Keep just one open at a time unless you’ve got a 3hp or larger collector.
Point blast gates with the plate facing the collector and tighten the thumbscrew that way to cut down on air leaks. Self-cleaning gates help prevent dust from jamming up the mechanism.
Connecting stationary and handheld tools
Stationary tools work better when you swap out factory 4″ dust ports for larger 6″ ones. This simple change substantially improves airflow. Put any reducers you need as close as possible to where the dust comes from.
Small dust ports on handheld tools don’t play well with large dust collection systems. These tools are a better match for shop vacuums or dedicated dust extractors with HEPA filtration.
Minimizing flexible hose usage
Flexible hose creates three times more resistance to airflow than smooth ductwork. Therefore, keep flex hose runs as short as possible – just enough to connect your tools. Every foot of flexible hose you remove gives you three more feet of collection range.
Conclusion
My years of experience with dust collection systems have taught me that effective dust management needs careful planning and quality components. In this piece, we’ve seen how good system design improves workshop air quality and tool performance dramatically.
The finest dust particles create the greatest health risks to your lungs, so investing in true HEPA filtration gives you vital protection. Setting up a detailed system needs some initial investment, but the long-term benefits are without doubt worth the costs.
Of course, your ductwork’s layout plays a significant role in system efficiency. Shorter runs with minimal bends maximize airflow, and strategic collector positioning reduces power needs. Your choice between single-stage and cyclone systems depends on specific needs and budget constraints.
The right connections between components make all the difference. Rigid metal ductwork minimizes resistance, and blast gates concentrate suction where needed. The dust collection system works at its peak when all elements combine harmoniously.
A workshop dust collection setup stands as one of the most important safety systems you’ll install. It protects your respiratory health and keeps your space clean for years. The fundamentals outlined here provide a starting point for customizing based on your workshop needs. Dust might seem like a minor nuisance, but proper management now prevents serious health issues later, making this workshop investment truly priceless.