Building a shed on a slope creates unique challenges for homeowners with uneven terrain. When I saw a sloped site with a 3-foot height difference between high and low points, standard shed foundation methods proved useless. Ground construction on slopes increases erosion risk and leads to drainage problems that can destabilize your shed.
The right foundation solves these problems. A gravel foundation with a lumber perimeter works best on uneven ground. This setup absorbs and channels water to prevent mold and rot. Another option is the post-and-beam foundation that adapts well to slopes. This becomes crucial if you need to dig below the frost line, which reaches 30 inches deep in places like Maryland. In this piece, you’ll learn how to build a shed foundation on a slope through practical, tested methods that DIY beginners can handle. The step-by-step approach covers everything from picking the right foundation for your slope to avoiding mistakes that affect your shed’s durability. What starts as an intimidating project becomes manageable with these proven techniques.
Choosing the Right Shed Foundation for a Slope
The right foundation makes all the difference when you’re building on a sloped yard. Your choice depends on the steepness, what kind of soil you have, and how much you can spend.
Gravel vs Concrete vs Blocks: Pros and Cons
Gravel Foundations work great on slopes because they flex and drain well. They keep water from splashing against your shed and reduce rot risks. Gravel bases cost between $5-10 per square foot and need about 5 inches of be deep enough to last. You might need a frame to hold everything in place, especially on steeper slopes.
Concrete Foundations give you the most stability and last the longest. They work best for:
- Heavy structures like garages
- Places with extreme frost heave
- Structures you want to stay put
All the same, concrete has some big drawbacks. It costs more, doesn’t drain well, and it’s tough to install on slopes. Water tends to collect around concrete bases, which can damage your shed as time goes by.
Concrete Block Foundations are simple and won’t break the bank. They go in quickly and you can adjust them easily for different heights on slopes. The catch? They don’t support your shed evenly, so you might end up with sagging floors or doors that stick over time.
When to Use Each Type Based on Slope Severity
A gravel pad with a good retaining frame works perfectly for slight slopes (1-5%). You can build up the downhill side with gravel to make it level. Concrete blocks can work too if you level each one carefully.
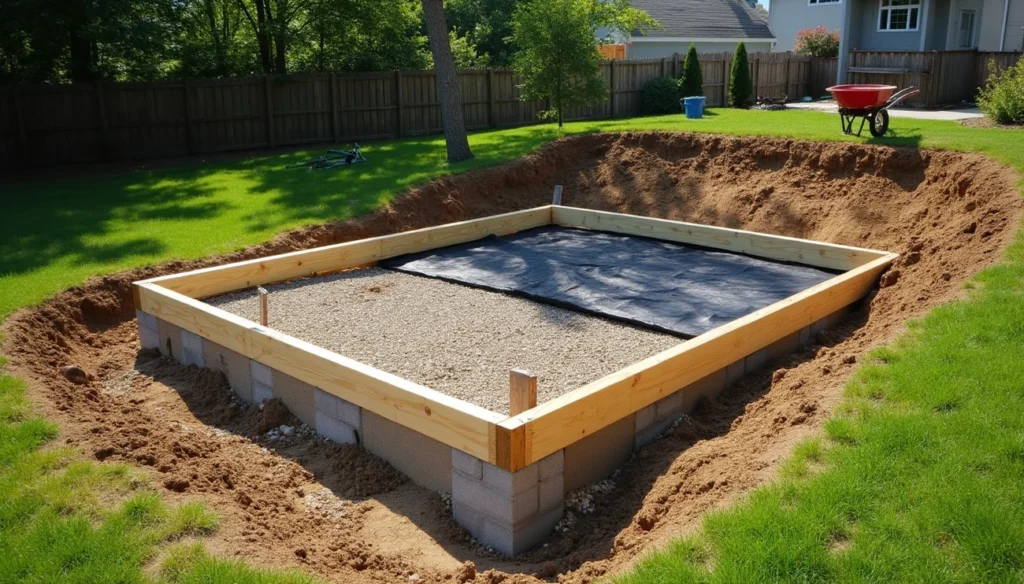
Moderate slopes might need a mix of approaches. A pressure-treated wood box filled with gravel creates a level spot and drains naturally. This costs less than digging out the whole area.
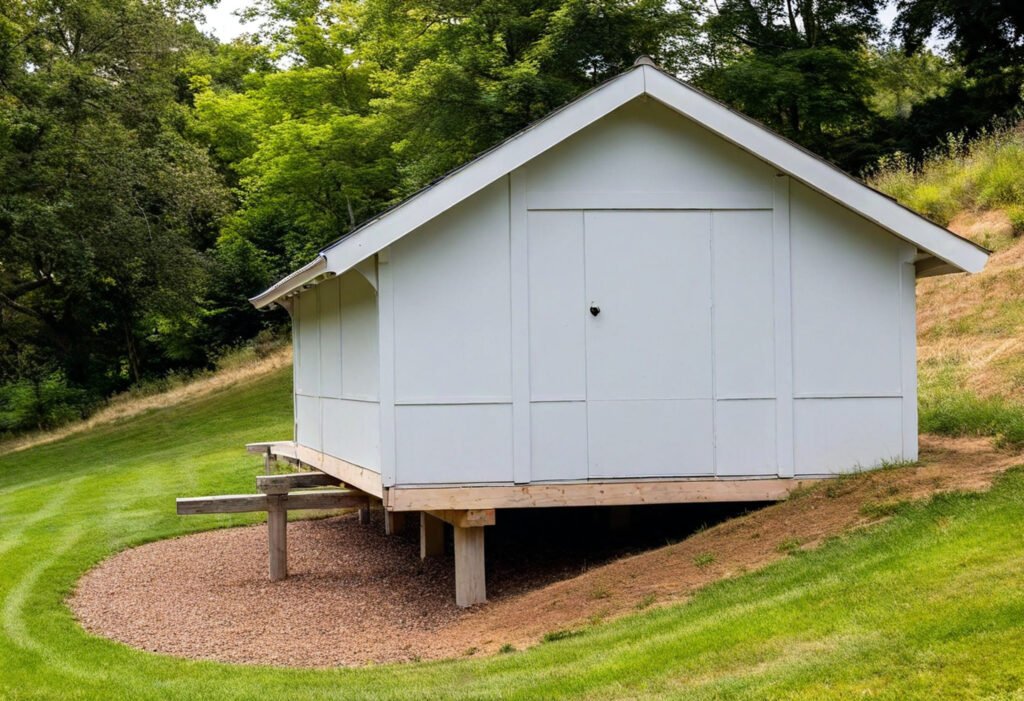
Steep slopes (over 5%) need special foundations. Here are your options:
- Post-and-beam structures that lift the shed
- Concrete piers that go below the frost line (usually 30-48 inches deep in cold areas)
- Helical piers (screw piles) work well in hard clay soils
The frost line’s depth changes a lot depending on where you live. You should check your local conditions before picking your foundation type.
Tools and Materials You’ll Need
Building a slope-based shed project needs specific tools and materials that create a stable foundation. Here’s a detailed breakdown of everything you need to handle this challenging terrain project.
Essential Tools for Ground Prep and Leveling
The lifeblood of any successful shed foundation on a slope is proper ground preparation. You’ll need these tools:
- Measuring tools: Tape measure, string line, and a line level that determines slope angles accurately
- Marking supplies: Stakes, spray paint, and mason’s string to mark your foundation area
- Digging equipment: Shovels (both flat and pointed), a pickaxe for tough soil, and a mattock that removes roots
- Leveling tools: A laser level or 4-foot carpenter’s level, plus a long straight board that checks larger areas
A tamper (manual or powered) helps compact soil and gravel effectively. Slopes with more than 5% grade might need a mini-excavator rental that saves hours of manual work.
Materials for a Gravel Shed Base
A reliable gravel foundation needs these materials:
- Gravel: About 4-6 inches of #57 crushed stone (¾-inch) that helps drainage
- Base layer: 2-4 inches of compactible gravel (#21 or similar) that adds stability
- Landscape fabric: High-quality weed barrier that stops vegetation growth
- Lumber: Pressure-treated 4×4 or 6×6 timbers that create a retaining frame
- Hardware: Galvanized spikes or rebar that secure the timber frame to the ground
Water management is crucial. Add a drainage pipe along the uphill side of your foundation that directs water away from your shed.
Optional Equipment for Easier Installation
These items aren’t mandatory, but they make your building experience better:
- Power auger: This tool helps dig post holes in harder soil
- Plate compactor: It works better than manual tampers
- Wheelbarrow or small dumper: Moving gravel becomes easier, especially on slopes
- Reciprocating saw: Perfect for trimming roots or lumber on-site
Safety gear matters. Work gloves, safety glasses, sturdy boots, and knee pads make the job safer and more comfortable. Steep slopes might need temporary support structures that create a safe working platform.
Step-by-Step: How to Build a Shed Foundation on a Slope
Building a shed foundation on uneven terrain needs good planning and careful execution. Your foundation type choice leads to these steps that will create a stable base to support your shed over time.
1. Select and Clear the Site
The highest point in your yard works best for drainage. Local townships often need permits and have rules about distance from property lines – check these first. My experience shows that you should avoid swampy, low-lying areas. These spots make it hard to build a solid base and can lead to mold problems. Clear all vegetation, debris, trees, and stumps from the area. Add an extra 12-16 inches beyond your planned shed perimeter.
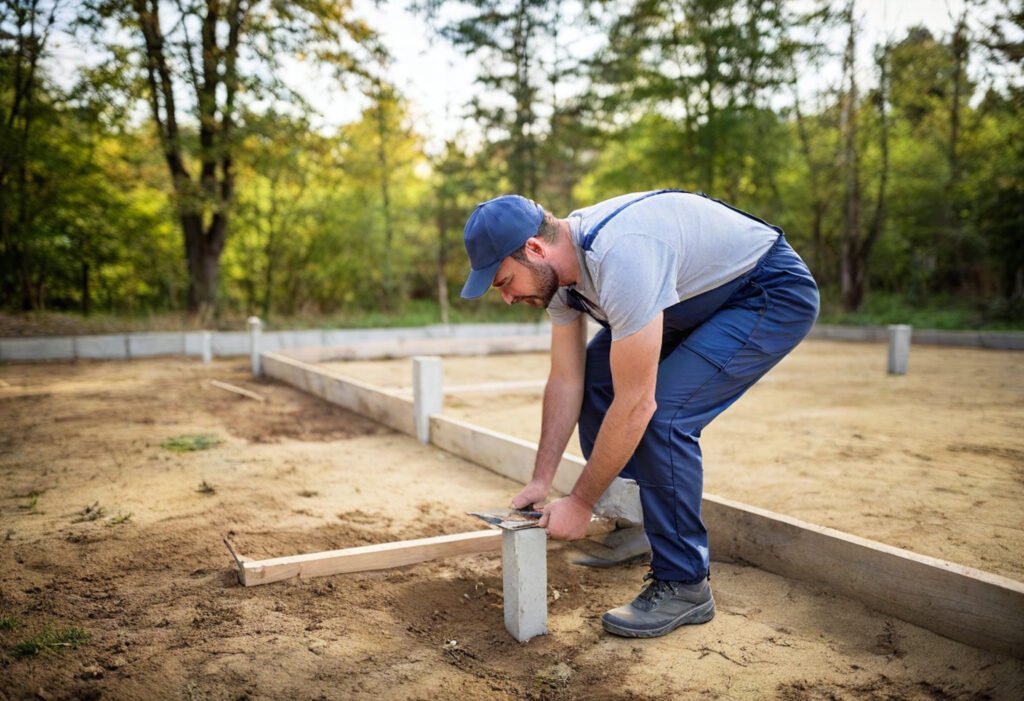
2. Measure the Slope and Mark the Area
A laser level or string level helps determine your slope’s steepness. Put stakes at each corner and connect them with string to outline your foundation area. Take readings at the highest corner and measure the difference at other corners. This shows how much you need to dig or build up. A perfectly square foundation needs equal diagonal measurements between corners.
3. Excavate and Level the Ground
Your door placement shapes your approach:
- Doors on the uphill side: Build up the downhill end
- Doors on the downhill side: Dig into the slope
- Steep slopes: Use both methods
Take out 4-6 inches of topsoil from the whole area. Sites with big drops (like 3 feet between corners) might need stepped sections using pressure-treated timbers.
4. Build and Anchor the Perimeter Frame
Use pressure-treated 4×6 or 6×6 lumber rated for ground contact to build your frame. Begin at the lowest point with the first timber and work around. The frame must be perfectly level. Make 5/8-inch holes through the lumber and drive 2-3-foot rebar pieces through these holes into the ground. Use 10-inch structural screws to secure corners.
5. Add Landscape Fabric and Gravel
A secure perimeter lets you install landscape fabric across the area and up the frame’s inside walls. This stops weeds and keeps gravel from sinking into the soil. Overlap fabric pieces and extend them 2-3 inches up your frame’s sides for best results. Add 4-6 inches of 3/4-inch crushed stone (#57 gravel) and spread it evenly with a rake.
6. Compact and Finalize the Base
Your base’s longevity depends on proper compaction. Start 12 inches from the perimeter and work inward in circles. This method prevents pushing gravel sideways and creates even compaction. Pack the outer edges after the center feels firm. A light water spray helps settle the gravel before final compaction. Check levels again and fill low spots with more gravel.
Common Mistakes to Avoid When Building on a Slope
DIY shed builders often make mistakes that can ruin even the most careful plans. I’ve spent years helping homeowners build on slopes, and I’ve seen three major errors that keep showing up. These mistakes will make your shed fail sooner than it should.
Ignoring Drainage Requirements
Water management makes all the difference when you build on sloped terrain. Poor drainage lets water pool around your foundation. This slowly erodes the ground under your shed. The problem gets worse quickly – standing water makes the soil unstable. Your shed starts to shift, and structural damage follows.
Water behaves differently on slopes than it does on flat ground. Don’t just put small drains where you see water collecting. You need a complete drainage solution that matches your specific terrain. Steep properties need drainage pipes along retaining walls. This stops water from building up and damaging both the wall and foundation. You should also place filter fabric over packed soil before adding gravel. This keeps soil from mixing into your drainage layer.
Using the Wrong Base Type for Your Slope
Sloped surfaces need specific types of foundations. First-time builders often try to use techniques that work on flat ground, but that’s a recipe for trouble.
Concrete blocks might look like an easy fix for gentle slopes. The problem is they won’t support your shed’s floor evenly. Your floors will start to as, and doors won’t close right. Concrete blocks also don’t work well as foundations in areas that get frost.
Gravel foundations work great on slopes because they drain well and can adapt to the ground. Steeper hills need retaining walls to give you the structural support that simple block foundations can’t provide.
Skipping the Compaction Step
Most builders know about compaction but don’t do it right. This step matters more than you might think. Without proper compaction, your foundation materials will settle unevenly. Your whole structure will start to shift.
Start compacting about 12 inches from the edge and work your way in with circular motions. This method spreads the material evenly instead of pushing it to one side. After you pack down the middle, go back and finish the edges. A lot of builders forget to wet the gravel slightly before compacting it. This simple step helps everything settle better and makes your foundation more stable.
Conclusion
Building a shed foundation on a slope brings unique challenges. The right approach will help your structure stand securely for years to come. In this piece, we explored how proper foundation selection based on your specific slope conditions creates the backbone of a successful project. The essential tools, materials, and step-by-step processes needed will help you turn challenging terrain into a stable base for your shed.
Note that drainage remains the most critical factor to deal with sloped terrain. A properly constructed gravel foundation with adequate water management prevents damage that can get pricey – something many DIY builders face after completing their projects. Without doubt, taking time to measure accurately, excavate properly, and compact the ground pays off in the long run.
My experience with hundreds of sloped shed foundations shows that patience during the foundation phase ended up saving both time and money. You might feel tempted to rush through ground preparation to get to the more visible parts of shed construction. Your foundation determines whether your shed will remain level and functional for decades or need premature repairs. By avoiding the common mistakes we discussed, especially when you have drainage and compaction issues, you’ll create a solid platform that stands up to slope challenges. Your shed will be a valuable addition to your property instead of becoming a source of ongoing frustration.