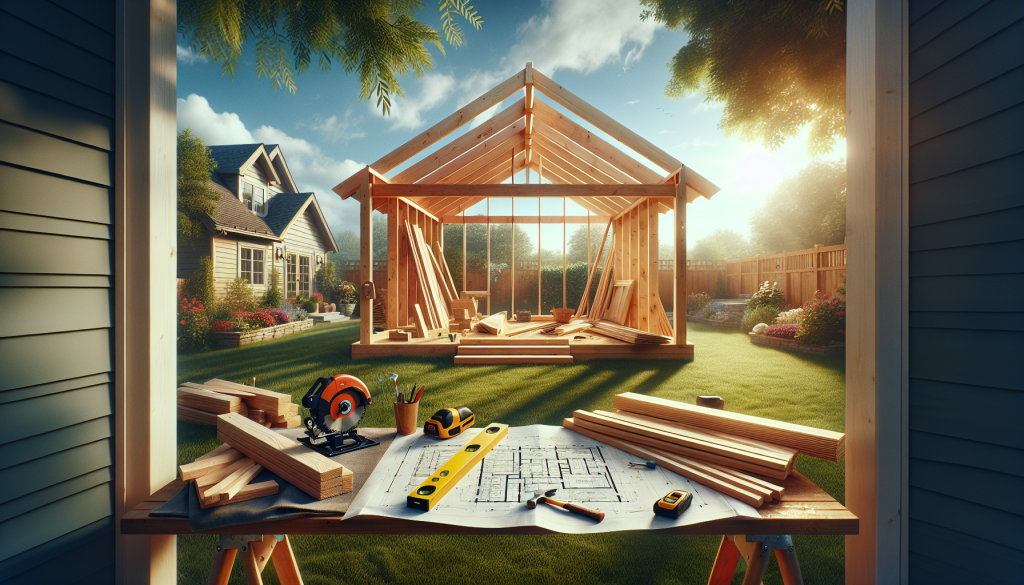
Have you ever dreamed of having your own storage shed but thought it was out of reach? Building your own shed can be a rewarding project that saves you money and gives you a custom space for your needs. Whether you’re looking to create extra storage or want to build a garden shed, this guide will help you tackle the project with confidence.
You’ll learn everything you need to know to build your own shed from start to finish. We’ll cover planning your project, gathering materials and tools, preparing the site, framing the structure, and adding exterior finishes. By following these essential tips for beginners, you’ll be well on your way to constructing a sturdy and functional shed that meets your exact specifications.
Planning Your Shed Project
Before you start building your own storage shed, it’s crucial to plan your project carefully. This step will ensure that your shed meets your needs, complies with local regulations, and fits within your budget. You’ll also need a set of high quality plans that clearly show your new shed. Let’s break down the key aspects of planning your shed project.
Determining Size and Location
The size and location of your shed play a significant role in its functionality. To determine the ideal size, consider what you plan to use the shed for. Will it be a simple storage space for garden tools, or do you envision it as a workshop or hobby area? Make a list of items you intend to store and factor in any additional space you might need for future belongings.
When choosing a location, keep these points in mind:
- Accessibility: Place your shed in a spot that’s easy to reach but doesn’t interfere with your yard activities.
- Privacy: If you want to create a secluded space, consider positioning the shed in a screened area of your yard.
- Future additions: Leave some extra space around the shed for potential extensions or landscaping.
- Yard size: Your available space will influence the maximum size of your shed.
Remember, a well-placed shed enhances both the functionality and esthetics of your property.
Checking Local Building Codes
Before you start construction, it’s essential to familiarize yourself with local building codes and zoning requirements. These regulations vary depending on your location, so check with your local government for specific guidelines. Here are some common considerations:
- Permit requirements: In many areas, sheds under 144 square feet don’t require a permit. However, larger structures often do.
- Setback rules: Typically, sheds must be placed at least 5 feet from property lines, but this can vary.
- Height restrictions: Some localities have limits on shed height.
- Utility connections: If you plan to add electricity or plumbing, additional permits may be necessary.
To avoid potential issues, obtain all required permits before starting construction. This step will save you time and potential fines in the long run.
Creating a Budget
Developing a realistic budget is a crucial part of your shed project. Consider these factors when estimating shed building costs:
- Materials: List all the materials you’ll need, including lumber, roofing, siding, and hardware.
- Tools: Factor in the cost of any tools you might need to purchase or rent.
- Permits: Include fees for any required building permits.
- Labor: If you’re hiring help, include these costs in your budget.
To keep costs down, consider using materials you already have on hand. Many DIY enthusiasts have successfully built sheds using repurposed materials from their garages or other projects.
By carefully planning your shed project, you’ll be well-prepared to move forward with construction. Remember, a well-thought-out plan is the foundation of a successful build.
Gathering Materials and Tools
To build your own storage shed, you’ll need to assemble the right materials and tools. This step is crucial to ensure a smooth construction process and a sturdy final product. Let’s break down what you’ll need into three categories: essential building materials, required tools, and safety equipment.
Essential Building Materials
Before you start building, gather these essential materials:
- Treated lumber for the sill plate
- Douglas Fir studs for framing
- Fir lumber for ceiling joists
- LP Smart Siding for exterior walls
- LP Smart Side Trim pieces for exterior finishing
- CMI Drip Edge for roof edges
- Sheathing for roof structure
- Tab roof shingles (in onyx black or your preferred color)
- Roofing underlayment
- Air vent louver for proper ventilation
- Windows (such as ThermaStar Pella)
- French doors for entry (customize mullions, color, and style as desired)
- Brass door hardware
- Exterior paint (consider Rain Refresh Paint in SW Nuance or your chosen color)
- Rebar and concrete for the foundation pad
Required Tools
To construct your shed efficiently, you’ll need these essential tools:
- Tape measure
- Carpenter’s pencils
- Framing square
- Level (both line level and 4′ level)
- Hammer and framing hammer
- Circular saw
- Electric miter saw
- Cordless power drill
- Impact driver
- Framing nailer (optional but highly recommended)
- Roofing nailer
- Air compressor (for pneumatic tools)
- Utility knife
- Shovel and rake
- Post hole digger (if using a pier foundation)
- Ladders (both 6′ and extension)
- Sawhorses (2)
- Paint sprayer (for finishing touches)
Safety Equipment
Safety should be your top priority when building a shed. Make sure you have the following safety gear:
- Safety glasses or goggles
- Hard hat
- Steel-toed boots
- Work gloves
- High-visibility vest
- Fall-arrest harness (if working at heights)
- First-aid kit
- Fire extinguisher
Remember, having the right materials, tools, and safety equipment not only makes the job easier but also ensures a safer working environment. Before you start, double-check that you have everything you need to avoid unnecessary interruptions during the building process.
Preparing the Site
Clearing and Leveling the Ground
To build your own storage shed, you need to start with a solid foundation. This process begins with selecting the right location and preparing the ground. Here’s how to go about it:
- Choose the ideal spot: Look for an area that’s easily accessible and esthetically pleasing. Consider factors like ground slope and proximity to your driveway. Avoid areas that pool water during heavy rains.
- Mark the area: Use stakes and string to outline the shed’s footprint. Ensure the corners are square by using the 3-4-5 rule (Pythagorean Theorem). Measure diagonally across corners to verify they’re equal.
- Check for underground utilities: Before digging, make sure there are no sprinkler lines or utility wires beneath the surface.
- Remove sod and topsoil: Dig out 3 to 4 inches of sod and topsoil. This soft layer is too fragile to support your shed’s weight.
- Level the ground: Use a shovel for digging and a rake for leveling. Pay attention to high and low spots, adjusting by removing or adding soil as needed.
- Compact the soil: This step ensures a solid base and prevents future settling or shifting.
Installing a Proper Foundation
A proper foundation is crucial for your shed’s stability and longevity. Here are some options to consider:
- Crushed stone base:
- Fill the excavated area with 4″ to 6″ of 3/4″ crushed stone.
- Use a 2×4 lumber with a level to ensure a flat surface.
- This method provides excellent drainage, especially in areas prone to waterlogging.
- Concrete slab:
- Ideal for heavy-duty sheds or wet areas.
- Offers a permanent and sturdy base.
- Concrete blocks:
- Perfect for leveling a shed on uneven ground.
- Place blocks under the shed’s corners and key points to create a level base.
- Pier foundation:
- Suitable for significantly sloped areas.
- Involves driving sturdy posts into the ground at each corner (and sometimes in between for larger sheds).
- Wood frame with gravel:
- Cut 4×6 wood lengths for the frame and lay them in place.
- Join the lengths with screws and square the frame.
- Fill the area with crushed stone.
- Consider laying landscape fabric before adding gravel to prevent weed growth.
Remember, a level foundation is essential for your shed’s stability and longevity. It prevents leaning and unnecessary wear on structural elements, ultimately extending your shed’s usable lifetime. Take your time with this step – a well-prepared site makes the rest of the construction process much smoother.
Framing the Shed
Now that you’ve prepared the site and laid the foundation, it’s time to start framing your shed. This process involves building the floor frame, constructing wall frames, and erecting the roof trusses. Let’s break down each step to help you build your own storage shed with confidence.
Building the Floor Frame
To build a sturdy floor frame, follow these steps:
- Install layout marks on the rim joist boards. Cut the rim joist boards to the length specified in your plans and stand them on edge next to each other. Make sure the crown edge is on top and the ends are flush.
- Mark the floor joist locations at 16 inches on center. Hook your tape measure on the ends of the boards and make marks every 16 and 3/4 inches. Place an X on the side of the mark closest to the tape measure hook to indicate where the floor joist will go.
- Set the rim joists and floor joists on the foundation rails. Separate the rim joists and place them on the foundation rails with the layout marks facing up. Crown each floor joist and align them with the layout marks on the rim joists.
- Nail the rim boards to each floor joist using 3 nails at each connection for 2×6 and 2×8 floor joists. Ensure each floor joist end aligns with its respective layout mark before nailing.
- Attach the rim boards to the foundation rails by toe-nailing at 16 inches on center. Use angled framing connectors every 3 to 4 feet to strengthen the connection.
- Square the floor framing by measuring diagonally from corner to corner. Adjust one rim joist and its attached floor joists until both diagonal measurements are equal.
Constructing Wall Frames
Building the wall frames is a crucial step in constructing your shed. Here’s how to do it:
- Mark wall locations on the shed floor. Measure 3 1/2 inches from the edges and place marks at each corner. Use a chalk line to mark the inner edge of the shed walls on all four sides.
- Cut the wall plates to length according to your plans. Set them in their final locations on the shed floor, aligning them with the wall marks.
- Install layout marks on the wall plates for stud and doorway locations. Mark every 16 3/4 inches, placing an X on the side where the stud will go. For doorways, mark King stud locations with a K and trimmer locations with a T.
- Cut wall studs to the proper length (92 5/8 inches for pre-cut studs). Assemble the wall plates and studs by nailing them together, ensuring the studs align with the layout marks.
- Build headers for doorways and windows by sandwiching a piece of OSB between two header boards. Nail them together using 12D nails.
- For walls with doorways, mark the header height on the King studs, then nail the King studs to the header boards. Install trimmer boards between the bottom of the header and the bottom plate.
Erecting the Roof Trusses
The final step in framing your shed is to erect the roof trusses:
- Use the floor deck as a jig for building roof trusses. Snap out lines on the floor deck to represent the full length of the trusses.
- Mark the center of the building and draw a reference line. For an 8-pitch roof, measure up 8 inches for every foot of horizontal distance from the center.
- Cut the bottom chord and two top cords for each truss using the angles determined by your roof pitch.
- Create plywood gussets to nail the truss together. Cut them to extend a couple of inches past the inside of the wall and about 8-10 inches on either side.
- Assemble the trusses using the floor as a guide. Use construction adhesive and screws to attach the plywood gussets to the truss members.
- For gable end trusses, add small uprights to provide nailing surfaces for sheathing.
- Once all trusses are built, carefully lift and secure them to the top plates of your wall frames.
By following these steps, you’ll have successfully framed your shed, creating a solid structure ready for exterior finishes. Remember to take your time, measure carefully, and prioritize safety throughout the framing process.
Adding Exterior Finishes
Now that you’ve framed your shed, it’s time to add the exterior finishes. This process involves installing siding and trim, roofing the shed, and hanging doors and windows. These steps will not only protect your shed from the elements but also give it a polished, professional look.
Installing Siding and Trim
To begin the siding process, you’ll need to wrap your building with house wrap or tar paper. This step helps prevent splash back from rotting out your plywood, especially if you don’t have gutters. However, if you’re on a concrete slab with good drainage, you might skip this step.
Start by setting your corners. Run them an inch longer than necessary so they’ll stick down just below the vinyl siding. When cutting corners, use a compound miter saw with a fine finish blade, cutting slowly to prevent chipping.
Next, install the bottom starter strap. This is crucial as it sets the foundation for your siding. Make sure it’s straight and level, as this will determine how straight your entire wall of siding will be. Hook the bottom edge of your siding onto this starter strip.
When installing the siding panels, always lock together two factory edges. Keep the nailing flange on top and nail into the studs for strength. As you reach windows, you’ll need to cut notches in the siding panels. Measure carefully and use a utility knife to make precise cuts.
For trim, install the fascia on the eaves and gable ends of the shed roof first. The eave fascia goes on before the rake fascia on the gables. Install corner trim next, making sure the trim on the front of the shed covers the edge of the corner trim piece on the side.
Roofing the Shed
Begin the roofing process by laying down an underlayment of tar paper or felt paper. This provides a secondary layer of protection against leaks. Staple it securely, as you’ll be walking on it during installation.
Next, install drip edge around the entire roof. This helps direct water away from the fascia. At corners, create a hinge-like fold to wrap around the outside corner.
For the shingles, you’ll need three types: main architectural shingles, starter strips, and cap shingles. Start by installing the starter strips along the bottom edge of the roof, letting them overhang slightly. Then, begin laying your main shingles from left to right, staggering the seams as you go up the roof.
When you reach the peak, install cap shingles. These are typically perforated and should be broken along the perforation before installation. Overlap each cap shingle, nailing securely and ensuring they’re even to avoid a wavy appearance.
Hanging Doors and Windows
For windows, ensure you have a properly framed rough opening. For a 14 inch by 21 inch window, frame the opening to 14.5 inches wide by 21.5 inches tall. Install flashing tape on the bottom of the window’s rough opening, overlapping on both sides and extending about 2 inches over the window sill.
Apply a bead of high-quality exterior sealant around the entire perimeter of the window’s rough opening before installation. Press the window’s mounting flange firmly against the siding, embedding it in the sealant. Secure the window with 1.5-inch exterior-rated screws.
For doors, install J-channel around the door opening if your door doesn’t come with built-in J-channel. This allows the vinyl siding to slide in neatly. When hanging the door, use a level to ensure it’s perfectly plumb. Install the hardware according to the manufacturer’s instructions.
By following these steps, you’ll have a fully finished shed that’s not only functional but also esthetically pleasing. Remember to work safely, especially when on the roof, and take your time to ensure each component is installed correctly.
Conclusion
Building your own shed is a rewarding project that offers both practical benefits and personal satisfaction. By following the steps outlined in this guide, from careful planning to adding the final touches, you can create a custom storage space that meets your specific needs. The process has a significant impact on your property’s functionality and value, while also providing an opportunity to enhance your DIY skills.
To wrap up, remember that patience and attention to detail are key to a successful shed build. Take your time with each phase, from site preparation to exterior finishing, to ensure a sturdy and long-lasting structure. With the right tools, materials, and approach, you’ll soon have a beautiful and functional shed that you can be proud to say you built with your own hands.
FAQs
1. What are the steps involved in building a shed for beginners?
To construct a shed from scratch, follow these steps:
- Step 1: Start by constructing the foundation of the shed.
- Step 2: Assemble the floor frame.
- Step 3: Install floor sheeting.
- Step 4: Frame the walls.
- Step 5: Build the roof frame.
- Step 6: Attach exterior siding to the side walls.
- Step 7: Install plywood on the roof frame.
- Step 8: Finish by installing asphalt shingles on the roof.
2. What should I consider before starting to build a shed?
When planning to build a shed, keep the following in mind:
- Choose the location for the shed.
- Decide on the shed’s size and style.
- Select the type of roof and door.
- Plan the door installation carefully to ensure it’s in the appropriate spot.
- If you want windows, determine their size and type.
3. Is constructing a shed myself more cost-effective than buying one?
Building your own shed can be less expensive per square foot as it saves on labor costs. It also allows for greater creative and budgetary control. However, purchasing a pre-built shed can save time and spare you the hassle of sourcing materials.
4. How should I prepare the site before building a shed?
Begin by clearing the area of any weeds, shrubs, branches, or tree stumps. To prevent weeds from growing under the shed once it is built, consider laying down a sheet of garden fabric or a weed-proof membrane.
