You can save 20%-40% in labor costs by building an outdoor kitchen yourself. This puts $1,500-$6,000 back in your pocket – money that could upgrade your materials or add features to your backyard oasis.
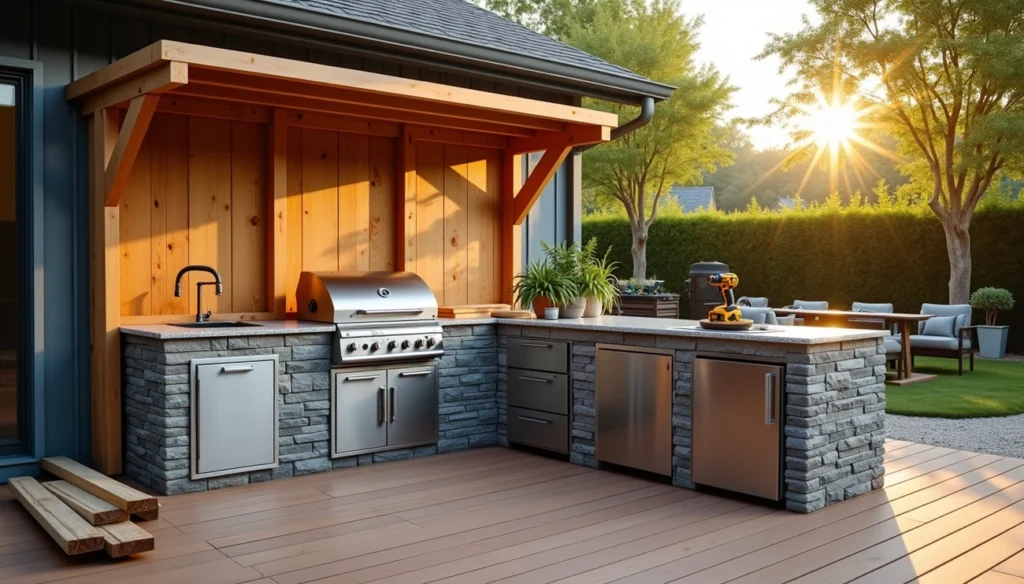
The cost of outdoor kitchen construction varies widely between $3,227 and $18,954. A well-planned outdoor kitchen creates a functional space without excessive spending. The average homeowner chooses a 12×16 structure with a bar package upgrade that costs around $6,975. Modular kits might seem convenient, but they tend to lack durability and last only a few years. This piece walks you through building an outdoor kitchen in just one weekend. We cover everything from material selection to appliance installation to help create your dream outdoor cooking space.
Planning Your Outdoor Kitchen
A successful weekend outdoor kitchen project begins with careful planning. You need to make smart decisions that will affect how you build and enjoy your space before you pick up any tools.
1. Choosing the right location
Your outdoor kitchen location needs to be close to your home. Place your kitchen near your backyard entrance so you can prepare and transport food easily. The closer you are to existing gas, water, and electrical lines, the less you’ll spend on installation.
Natural elements play a vital role too. Check which way the widespread winds blow to keep grill smoke away from dining areas. You’ll want a spot with natural shade from trees during hot summer cooking sessions, or you might need to add structures like pergolas.
2. Estimating your weekend budget
A simple outdoor kitchen costs between $9,500 and $50,000 based on size and features. Weekend projects work best with a simple grill island that typically costs $8,000 to $16,000 for the structure and counter.
Gas line installation runs about $1,500-$3,500, and basic lighting costs around $1,200. Building closer to your house saves money on utility runs. Don’t forget that permits and labor add to your total cost if you’re not doing everything yourself.
3. Deciding on layout and size
Your outdoor kitchen should take up about 20% of your deck or patio area. A 100-square-foot patio works well with a 20-square-foot kitchen space. Simple outdoor kitchens usually stretch 8-10 feet long, giving you enough counter space to prepare meals.
Pick a layout that matches how you cook. You can choose from linear (along a wall), L-shaped (separate prep and cooking areas), galley, U-shaped, or island designs. Each style offers unique benefits for space use and workflow.
4. Checking for permits and codes
Safety codes require grills and outdoor heat sources to sit at least 10 feet from your home. Local authorities need to approve permits for structural elements, electrical work, plumbing, and gas line installations before you start.
Gas installations need special attention. The International Residential Code says gas pipes must extend through floors with at least 2 inches of unthreaded pipe showing. Sink drains need proper P-traps and waste system connections, which might require professional help. If you skip permits, you could face fines or have to remove finished work.
Essential Components to Include
A successful outdoor kitchen needs carefully chosen components that work well with your weekend schedule. Let’s look at what you need to build your dream space.
1. Grill or smoker
Your outdoor kitchen’s centerpiece is the cooking equipment. Built-in grills come in sizes from 24-48 inches wide, with prices ranging from $200 to $4,000 based on features. Quality stainless steel options with good ventilation work best for a weekend build. Your cooking style should determine whether you want gas, charcoal, pellet, or electric fuel sources. Many homeowners add both a grill and a smoker for more cooking options.
2. Countertops and prep space
You’ll need at least 36 inches of clear counter space to prep food comfortably. Standard outdoor counters should be 30-36 inches deep to fit built-in grills and stand 36 inches tall. Weatherproof materials like granite ($50-$100 per square foot), concrete ($50-$75 per square foot), and outdoor-rated tile ($10-$40 per square foot) work great. Granite and quartz stand up well to weather and need little maintenance.
3. Storage and cabinets
Stainless steel cabinets and drawers keep your grilling tools, accessories, and supplies safe from the weather. A mix of storage works best – pull-out drawers for utensils, cabinets for bigger items, and special spots for paper towels or trash. A smart organization keeps your countertops clear for cooking and serving.
4. Sink and plumbing options
A deep stainless steel sink with a sprayer faucet runs about $100-$250. Your plumbing can either connect to your home’s water system or use a garden hose for cold water. Drainage needs a properly installed P-trap that connects to your home’s waste system or a dry well at least ten feet from your structure.
5. Refrigerator or cooler
Outdoor refrigerators cost between $400 and $2,000, depending on size and features. Weatherproof stainless steel models with adjustable shelves work best. Place refrigerators away from grills and other heat sources to help them run efficiently.
6. Lighting and electrical setup
GFCI-protected outlets should power all electrical components. Your lighting plan should include task lights above cooking areas, ambient lights for general visibility, and accent lights for style. All electrical parts must be outdoor-rated and weatherproofed to stay safe.
Materials and Tools You’ll Need
The right materials and tools can transform a weekend project into a month-long ordeal. Let’s take a closer look at what you’ll need to build an outdoor kitchen successfully.
1. Best materials for outdoor kitchen construction
Concrete blocks provide durability at $1.50-$3 per block, while steel studs cost $2-$4 per linear foot for framing. The concrete countertops deliver excellent value at $65-$135 per square foot, and granite remains popular at $40-$100 per square foot. Marine-grade plywood’s moisture resistance makes it ideal for cabinet construction.
2. Tools required for a weekend build
Beyond basic household tools, your project needs:
- Circular saw and drill with masonry bits
- Level, square, and measuring tape
- Angle grinder with masonry blade
- Caulking gun and concrete tools
- Socket wrench set for appliance installation
3. Pre-built kits vs. custom materials
Pre-built modular kits range from $1,500-$7,000 and allow quick assembly in 3-5 hours – perfect for weekend projects. Notwithstanding that, custom builds offer greater durability and personalization but need more time. Modular options come with aluminum frames and weather-resistant panels, while custom builds allow specific material selection based on your climate.
4. Weatherproofing and sealing tips
Exterior-grade silicone caulk works best for seams and joints. Concrete countertops need an annual penetrating sealer application. Marine-grade varnish protects wooden elements but needs reapplication every two years. Powder-coated or rust-resistant hardware withstands outdoor conditions effectively.
Step-by-Step Weekend Build Guide
Let’s get started and bring those plans to life with this complete weekend build process.
1. Build the frame
The foundation of my outdoor kitchen starts with a sturdy frame. I use pressure-treated 2×4s for wood frames or metal studs and mark the dimensions on my patio or deck. My vertical posts need to be 36 inches tall minus the countertop thickness to get the standard countertop height. I create corner posts first with my circular saw. Then I add horizontal supports and cross braces that make it stable. The frame gets extra strength when I use wood glue at all joints and secure them with exterior-grade screws. When using concrete blocks, they need a proper concrete footing so they don’t sink over time.
2. Add sheathing and finish
The frame needs cement board coverage using 1″ self-drilling screws about 10″ apart. I cut openings where appliances and cabinets will go. Builder’s felt and wire lath come next, nailed securely every 6″ vertically. The mortar should feel like peanut butter when mixed. I apply a ½-inch scratch coat and score it horizontally with a notched trowel. This creates texture, so stone veneer sticks better. The countertops go in after a 24-hour curing period. They must be perfectly level.
3. Install appliances and fixtures
The structure is ready for cabinets that fit into their designated openings. Everything needs to be level and secure. My grill, refrigerator, and sink need proper positioning based on the manufacturer’s specs. Good ventilation is crucial. The cabinet boxes are made from plywood that fits my frame’s depth. I leave a flange around the front where the doors will attach.
4. Connect utilities safely
Safety and code compliance matter when connecting water, gas, and electricity. Outdoor-rated Pex or Poly pipe with proper insulation works best for plumbing. Gas line installation needs certified professionals because of safety risks. GFCI-protected outlets in weatherproof boxes handle the electrical work. Each utility needs accessible shut-off valves that help with maintenance and winterization.
5. Final touches and testing
Cabinet doors and remaining stonework wrap up the main construction. Every appliance needs testing before the first cookout. I check that everything works right and look for water or gas leaks. Good outdoor lighting makes cooking areas bright and safe. A fire extinguisher nearby adds an important safety measure. Once everything works perfectly, my weekend outdoor kitchen is ready for countless memorable meals!
Conclusion
A DIY outdoor kitchen project needs careful planning and weekend dedication, but the results are worth every minute spent. This piece covers everything from picking the perfect spot to safely connecting utilities. You can save thousands in labor costs by doing it yourself, and redirect that money toward better materials or extra features.
Your kitchen’s distance from the house matters substantially – both for convenience and reducing utility costs. You should check local permits and codes before starting to avoid mistakes that can get pricey and create safety hazards later.
The charm of a weekend outdoor kitchen lies in keeping things simple and focused. We’ve stuck to what really works instead of complex designs: a quality grill, sturdy countertops, smart storage, simple plumbing, and good lighting. These elements create a practical cooking space without making things complicated.
Weather-resistant materials are crucial for making your kitchen last. Concrete blocks, stainless steel, and marine-grade plywood handle the elements much better than regular options. Good sealing and weatherproofing will protect your investment over the years.
Your completed outdoor kitchen will make you question why you didn’t build it sooner. Every time you light up the grill or host friends in your new space, you’ll feel proud knowing you built it yourself. The money saved is great, but nothing beats cooking in a kitchen you created with your own hands. Grab your tools, block off a weekend, and create the outdoor entertainment space you’ve always wanted.