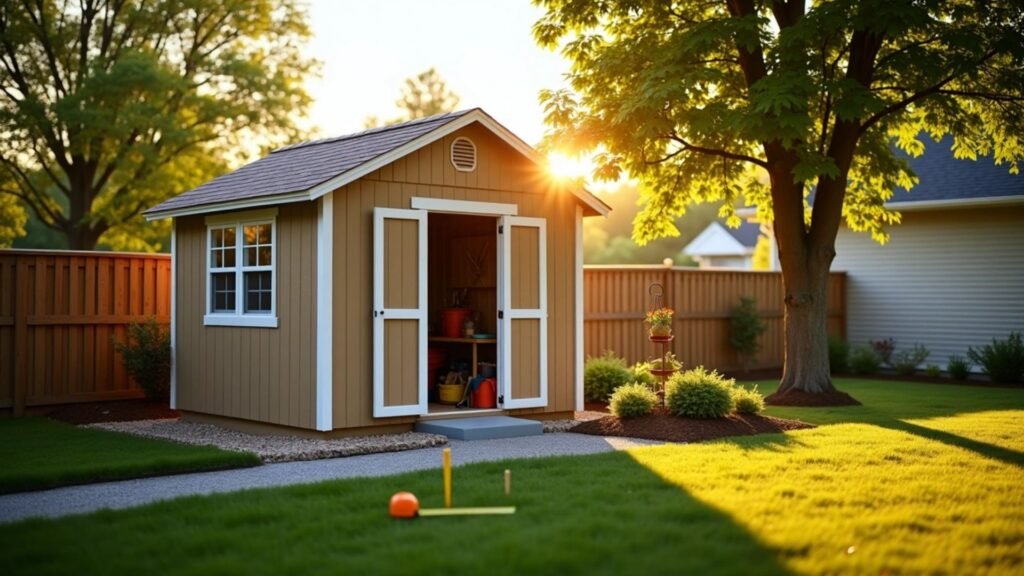
The right shed placement in the yard makes all the difference between a structure lasting decades and one failing within months. Poor placement turns water into your shed’s worst enemy that leads to rot, mold, and costly structural damage.
Local regulations should guide your shed location decision. Your municipality likely requires sheds to sit between 3 and 10 feet from property lines. Some areas need sheds to be at least 2 meters from house boundaries and cover no more than 50% of your garden. The best shed placement in the yard needs to balance practical aspects like drainage with visual appeal. Your shed should look like a natural extension of your home. This piece will help you figure out where to put a shed while meeting legal requirements, managing environmental factors, and maximizing daily use.
What you’ll learn:
- How to assess your yard’s drainage and stability
- Finding the right balance of sunlight and shade
- Making your shed available for its intended purpose
- Navigating legal requirements and utility considerations
Evaluate Your Yard for the Best Shed Placement
The best way to start shed placement in the yard begins with a full picture of your property’s terrain. You need to look beyond available space and consider what affects your shed’s lifespan and how well it performs over time.
Check for flat, stable ground
A level area makes all the difference when placing a shed. Your shed won’t work right if the foundation isn’t even – doors will stick, walls will warp, and the roof will start to sag. My first step involves using a measuring tape and a notepad to identify flat spots that accommodate the size of my shed, plus extra room for the doors to swing open. Most yards aren’t naturally flat enough, so I use a long board with a carpenter’s level to check possible locations.
Avoid low spots and pooling water
Water is, without doubt, your shed’s biggest enemy. You must stay away from low-lying areas where moisture builds up. Standing water around the base creates rot, rust, and mold that can cut your shed’s life span by a lot. These moisture issues will damage the structure and turn into expensive repairs while creating perfect spots for mosquitoes to breed.
Walk the yard after rain to observe drainage
The best way to learn about good shed spots comes from watching your yard during or right after rain. This simple check shows you the natural water flow patterns in your space. Watch where water pools and how fast it drains away. You can also dig a 12-inch hole, fill it with water, and time the drainage. The spot needs better drainage if water stays there more than 24 hours.
Use natural slopes to your advantage
Your yard’s natural slopes can help you find the perfect shed spot. The ground should slope away from your shed about 1 inch per foot for at least 10 feet past the foundation. A gravel pad foundation works great for gentle slopes under 4%. Steeper slopes might need special solutions like terracing or retaining walls to create a flat spot.
Taking time to check these factors before setting up your shed helps you dodge problems with water damage, structural issues, and early wear and tear.
Sunlight and Shade: Finding the Right Balance
Sunlight exposure is a vital part of where to put a shed. Your shed’s functionality, comfort, and longevity depend on it. Light patterns change throughout the day and seasons, creating an ongoing relationship between your shed and the sun, unlike terrain factors.
South-facing sheds and heat exposure
South-facing spots get the most direct sunlight all day. This can lead to too much heat and faster wear and tear. Dark-colored sheds in direct sun can reach surface temperatures of 160 degrees or higher in hot places like Texas. This heat moves into the structure and puts stress on both wood and paint. The intense sun breaks down paint pigments faster and damages exterior finishes through expansion and contraction. Light-colored sheds stay 40 degrees cooler in similar conditions. This shows how much your placement decisions matter in south-facing yards.
Morning vs. afternoon sun
Morning sunlight works better than afternoon exposure. Early sun stays cooler and less intense. It helps dry overnight moisture without making the structure too hot. This gentle warmth fights dampness that causes mold and rot. You could call it a natural way to maintain your shed. The afternoon sun hits differently, especially from the west. It brings the day’s strongest heat that can harm sensitive items inside. My experience shows that 4-6 hours of morning sun with afternoon shade creates the best balance to place your shed in the yard.
When to use natural shade
You need smart shade placement to get the best shade placement in the yard, especially in warmer areas. Trees, tall bushes, and vines on the west and south sides can cut down heat by a lot. All the same, don’t put sheds where shade stays all day. Too much dampness leads to mold and structural issues. You might want to point windows away from western exposure. This cuts down heat while keeping natural light flowing.
Sunlight needs are based on the shed’s purpose
We used different amounts of light based on the shed’s job. Workshop or hobby spaces need natural lighting to feel welcoming. Too much direct sun makes summer work impossible, though. Storing temperature-sensitive items like paints, chemicals, or electronics? You’ll need spots with natural shade protection. Greenhouse setups thrive with maximum direct sunlight. Firewood storage needs enough sun to control moisture and help the seasoning. Watch out in hot climates, though – too much sun can warp the wood.
Accessibility and Daily Use Considerations
Your shed placement in the yard choices will impact how you use the structure every day. The right spot makes a world of difference in convenience and functionality.
Place near the garden or garage for convenience
Let the main purpose of your shed guide its location. You should put it near your garden if you’re storing garden tools. Keep it closer to your house for snowblowers, bikes, or equipment you use daily. A shed full of lawn equipment works best when you can easily reach your yard or garden. Think about the path you’ll take from your shed to where you’ll use those stored items most often.
Leave space around the shed for movement
Your shed entrance should face an open area of at least 10 feet so you can move large equipment like wheelbarrows and lawnmowers easily. You need space on all sides for comfortable movement, especially when you mow. Put your shed at the end of your driveway if you have heavy equipment to make loading and unloading simpler.
Plan for ramps or wide doors if needed
A well-designed ramp becomes crucial when you store wheeled equipment. Choose a gradual incline (4:1 ratio) instead of a steep one. Make your ramp at least as wide as the doorway, with an extra 6-12 inches on each side. The doors must be wide enough to fit your biggest equipment.
Think about future use and aging in place
Your needs might change over the next 10-15 years. No-step entries and smooth thresholds make your shed safer and more valuable in the long run. Extra-wide doors help everyone – from people using wheelbarrows today to those who might need mobility aids later.
Legal and Utility Factors You Shouldn’t Ignore
Legal requirements and physical factors play a crucial role in your shed placement in the yard decisions. Good planning helps avoid neighbor disputes and keeps costs down.
Understand local zoning and setback rules
Your first step should be checking local zoning ordinances. Cities and towns need sheds to be placed at specific distances from property lines. These distances usually range from 5 to 15 feet based on your area. The rules might differ for side, rear, and front yard boundaries.
Check for underground utilities
You should call 811 (the national “Call Before You Dig” service) before starting any digging work. This free service helps mark underground utilities so you can avoid dangerous and expensive accidents. Make sure to schedule this service at least 3 business days before you start your project.
Permit requirements for different shed sizes
Small sheds (under 100-200 square feet) don’t need building permits in many areas, but size limits vary by location. Larger structures need proper permits and might require engineered plans. Even when permits aren’t needed, your shed must follow zoning rules.
Avoid building over septic or drainage systems
Placing a shed over septic tanks, leach fields, or drainage pipes leads to serious issues. Future repairs become very difficult to handle when these systems need work. You should keep at least 10 feet away from septic components.
Talk to your HOA if applicable
Your homeowners’ association rules might be stricter than local government requirements about where I put a shed on my property. Most HOAs want to approve your shed’s size, looks, materials, and location before you start installation.
Conclusion
Your shed’s location needs more thought than just finding an empty spot in your yard. This piece explores the key factors that separate a long-lasting, useful shed from one that becomes a problem in just a few months.
The biggest problem you’ll face is drainage. Water damage that’s left unchecked ended up causing rot, mold, and structural issues. You’ll save money on repairs by picking higher ground where water naturally flows away from your building.
The balance between sun and shade matters just as much for your shed’s durability and use. The best spot usually gets nice morning light but stays protected from the harsh afternoon sun, especially on the western side. Your shed’s main use should guide where you put it – a garden shed needs different light than a workshop.
Easy access seems obvious, but it’s something many people wish they’d thought about more. The right spot lets you move things in and out easily, keep the area around it clean, and use it comfortably as you get older.
Building codes are more than just red tape. Rules about distance from property lines, utilities, permits, and HOA guidelines can limit your options a lot. Following these rules helps you avoid expensive fixes or problems with neighbors.
The right spot for your shed needs to work with all these factors and your specific needs. Taking time now to get a full picture will give you a useful, strong structure that boosts your property’s value. Once you’ve looked at water flow, sunlight, access, and legal requirements, you’ll have a shed that works perfectly – right where you need it.