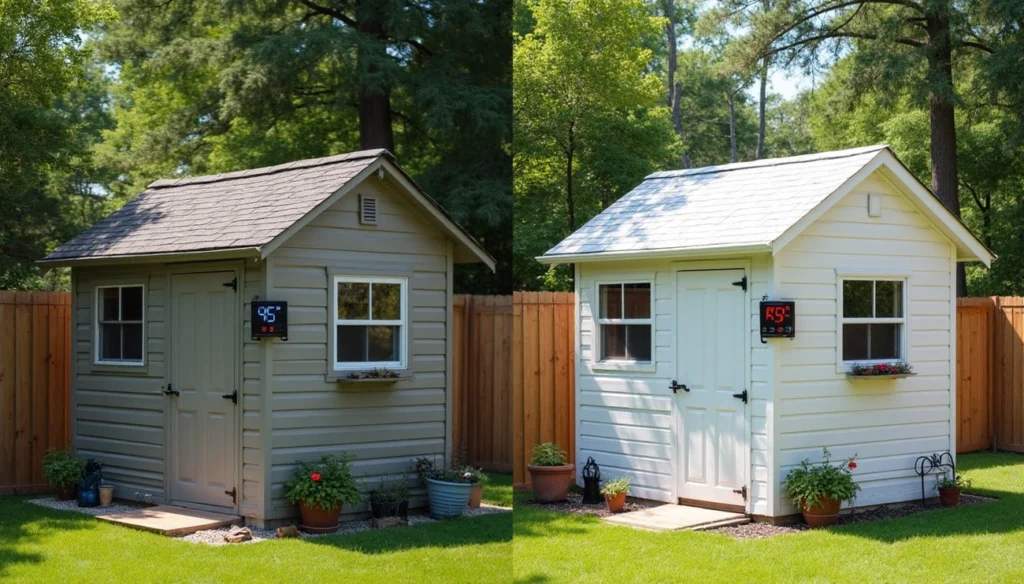
Shed insulation changes a simple storage space into a versatile year-round environment that works perfectly as a quiet workspace, guest house, or climate-controlled storage unit. A properly insulated shed stays up to 20 degrees cooler during summer months and provides comfort for activities of all types.
The cost of shed insulation remains reasonable. Professional installation typically costs around $2,300, but you can complete this project yourself for about $1,500. This piece guides you through every step to create a comfortable, temperature-controlled space. You will learn about choosing the right R-value (R-13 to R-23 for walls) and selecting appropriate materials like spray foam or fiberglass that serve your needs.
Understanding Shed Insulation Basics
Proper shed insulation transforms your space from seasonal storage to a year-round usable area. Understanding the simple science behind insulation helps you make smart decisions about your project before you start working with materials and installation techniques.
What R-value means for your shed
R-value shows how well your insulation resists heat transfer. It measures how effectively the material blocks unwanted temperature changes. Your insulation works better at maintaining your desired interior temperature with higher R-values.
Your shed’s walls should have an R-value between R-13 and R-23, based on your climate and your choice of 2×4 or 2×6 framing. You’ll need higher values for ceilings and attic spaces, usually R-30 to R-49, because heat rises naturally. Your floor needs attention too—good insulation can cut heat loss by up to 40% in cold weather.
The thickness of your insulation affects its performance. You can layer different types of insulation to reach your target R-value.
How insulation affects temperature control
A thermal barrier from insulation slows heat transfer. Your shed maintains steady internal temperatures whatever the outside conditions. This works both ways—heat stays in during winter and out during summer.
Poor insulation leaves your shed at the mercy of outside temperature changes. A well-insulated structure uses less energy for heating or cooling, which cuts operating costs if you use climate control equipment.
Insulation does more than provide comfort. It shields temperature-sensitive items inside your shed. Extreme temperatures can damage paints, electronics, fabrics, and wood furniture. Tools and metal equipment last longer in a stable environment with proper insulation.
Common problems with uninsulated sheds
Metal sheds without insulation often face condensation issues when warm air hits cold surfaces. This moisture creates several issues:
- Mold and mildew spread across walls, floors, and stored items
- Wood starts rotting and weakens the structure
- Tools and metal parts develop rust
- Water near wiring creates dangerous electrical situations
Temperature swings pose another serious challenge. Summer turns uninsulated sheds into ovens while winter freezes them solid. These extremes make the space uncomfortable and unusable for much of the year.
Ground moisture creeps up through uninsulated floors, creating dampness even with dry walls and ceiling. This hidden problem damages items sitting directly on the floor.
These simple facts about insulation guide your choices for materials, installation methods, and overall strategy to create a comfortable shed you can use all year long.
Choosing the Right Shed Insulation Materials
Your budget, climate, and shed’s purpose will determine the best insulation material. Each choice has its own perks that make it a good fit for different needs.
Spray foam: Benefits and limitations
Spray foam makes an airtight seal as it expands to fill gaps in walls, ceilings, and floors. Open-cell spray foam gives you an R-value of 3.5 to 3.6 per inch. Closed-cell foam does even better with R-6.0 to R-6.5 per inch. This material keeps moisture out and blocks sound, which makes it perfect for workshop sheds.
The biggest problem with spray foam is its cost—closed-cell foam runs between $1.00 and $1.50 per square foot. It also needs professional installation or special equipment, unlike other options you can DIY.
Fiberglass batts and rolls: The budget-friendly option
Fiberglass insulation is a great way to get the most bang for your buck in most shed projects. These glass fiber batts fit nicely between standard stud spacing and give you decent R-values from 3.1 to 3.4 per inch. A 12-inch batt can reach R-values between 37.2 and 40.8.
Fiberglass stays budget-friendly at about $0.60 for R-13 and $0.85 for R-30. All the same, watch out for moisture—wet fiberglass doesn’t work and can grow mold.
Rigid foam boards: Easy DIY installation
Rigid foam boards pack excellent insulation into a compact form. You can get them in polyurethane, polyisocyanurate, or polystyrene varieties, with high R-values per inch. EPS (expanded polystyrene) gives you R-4 per inch, while denser XPS (extruded polystyrene) reaches R-5.
These boards resist moisture and work great for floor insulation where other materials might get damaged. They’re handy to work with, but you’ll need to cut them precisely between studs—so measure twice before you start.
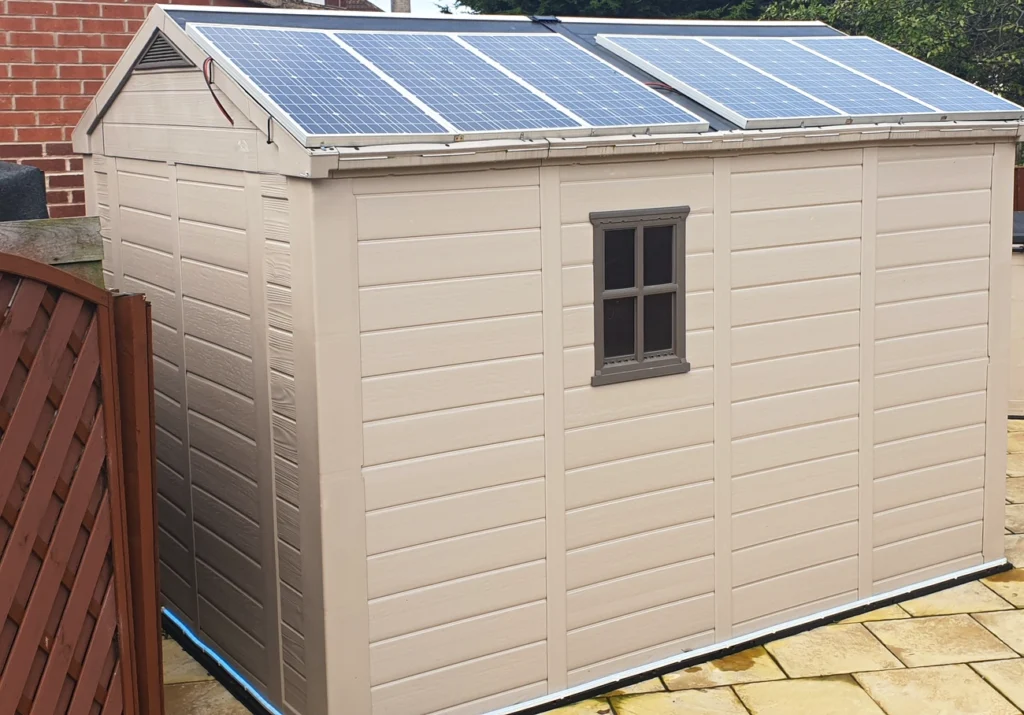
Radiant barriers for hot climates
Radiant barriers are a smart choice for sunny spots because they bounce heat away instead of soaking it up. These reflective materials can cut your cooling costs by 5% to 10% in warm areas.
These barriers bounce back 95-97% of radiant heat. A properly installed barrier with good cross ventilation keeps your shed’s temperature just 1-2 degrees above the outside air. Just remember to leave an air gap during installation—it’s crucial to make these barriers work properly.

Step-by-Step Insulation Installation Guide
A simple shed becomes a year-round usable space with proper insulation. You will get optimal performance and long-lasting results by doing this and being methodical.
Preparing your shed for insulation
Your shed needs inspection to find cracks, broken windows, or roof leaks that might affect insulation performance. These issues need repairs to create a solid foundation for your project. The walls, ceiling, and floor measurements will help determine exact insulation quantities needed. All surfaces should be clean and dry before you start. Safety gear like gloves, eye protection, masks, and proper clothing will protect you from skin irritation, especially with fiberglass materials.
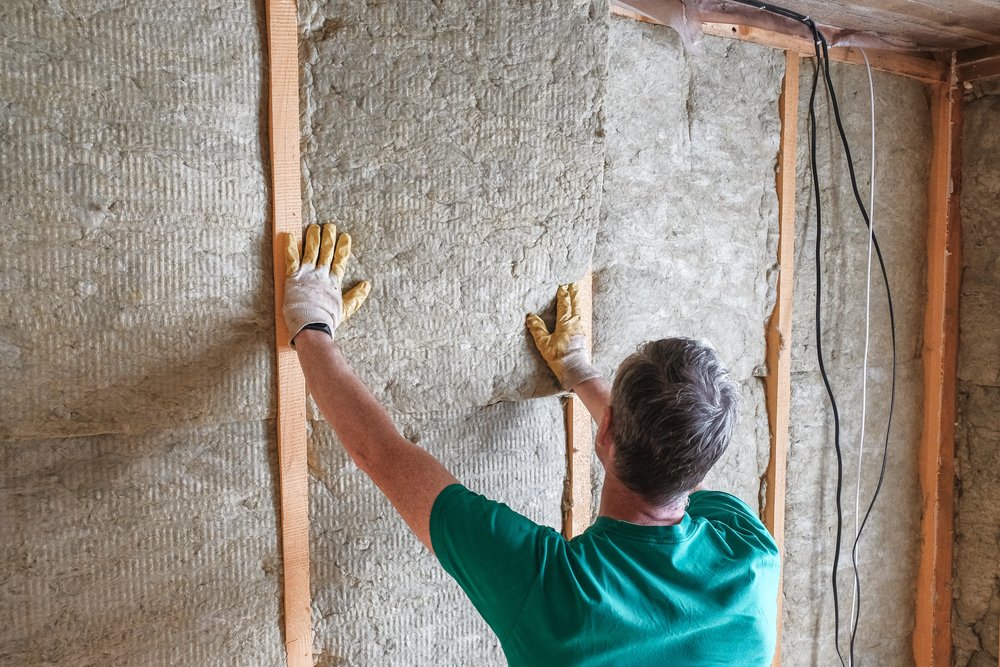
Wall insulation techniques
Cut your chosen insulation material slightly larger (about 1/2″ to 3/4″) than the space between wall studs to ensure a tight fit. Fiberglass batts should be pressed firmly into wall cavities and their paper facing (if present) stapled onto the wall studs. Foam boards can be attached directly to shed walls using adhesive. Areas with electrical outlets or wiring need careful cutting around obstacles without excessive compression of the insulation material. A vapor barrier installation comes next if your insulation lacks one—this step prevents moisture from building up inside walls.
Ceiling and roof insulation methods
The ceiling’s insulation needs proper ventilation. Baffles (rafter vents) maintain airflow between insulation and roof deck—these matter most where rafters meet walls instead of extending to the ridge vent. Plastic sheeting can temporarily hold fiberglass in place during overhead installation until the complete vapor barrier goes in. Note that proper roof ventilation stops moisture from accumulating and damaging your roof’s structure.
Floor insulation considerations
You can insulate the floor in two ways: from above by removing the subfloor or from underneath the shed. The top-down method requires emptying your shed and lifting the subfloor to install supporting boards between floor joists. These boards need 4-6 inch spacing. The rigid foam insulation stays in place with adhesive applied to joists and blocking boards. Working from below with rigid foam boards takes more effort but remains an option if you can access the underside.
Essential Tools and Safety Precautions
Your safety comes first when starting any shed insulation project. The right tools and safety gear will help you complete the installation successfully and keep you healthy throughout the process.
Required tools for insulating a shed
The right toolkit makes insulating a shed much easier. You’ll need these basic items:
- Utility knife or insulation knife (a bread knife works in a pinch)
- Tape measure to get precise cuts
- Staple gun with appropriate staples
- Caulking gun to seal gaps
- Straight edge or metal square to make clean cuts
- Ladder to reach the ceiling
- Hammer and nails
- Circular saw (if you need to cut rigid boards)
- Chalk line to mark straight lines
Spray foam applications need specialized equipment that often requires training to use correctly.
Protective gear you shouldn’t skip
Insulation materials can harm your skin, eyes, and breathing. The right protective equipment isn’t optional:
- NIOSH-certified N95 respirator or higher
- Safety goggles with side shields
- Gloves (skip cloth types that fibers can get through)
- Long-sleeved shirts and long pants
- Head covering to work overhead
- Loose-fitting clothing (don’t tape sleeves or pants at wrists)
You should cover as much skin as possible, especially when you work with fiberglass insulation.
Handling insulation materials safely
Each material needs specific safety measures. You should keep good airflow in your work area, especially if you use spray foam or other chemicals.
Fiberglass insulation requires extra care. Don’t rub or scratch if fibers touch your skin. Use adhesive tape to lift out embedded fibers. A layer of baby powder before you start can reduce irritation from particles.
Cut power to your work area before you begin. Keep materials that catch fire away from heat sources. Make sure your insulation meets fire safety standards.
Clean everything thoroughly after you finish. Take a shower right after working with insulation, and wash your work clothes by themselves to avoid spreading irritating particles in your home.
Conclusion
Shed insulation is a game-changing investment that turns a simple storage space into a comfortable environment you can use all year. I’ve learned that picking the right materials and following safety guidelines makes this DIY project doable and worthwhile.
DIY installation costs about $1,500, but the benefits are nowhere near the price tag. A well-insulated shed keeps temperatures steady and stops moisture damage. Your tools and equipment stay protected inside. On top of that, it saves energy costs from less heating and cooling needs, which helps cover the original expenses as time goes by.
The path to success needs careful planning and close attention to every detail. Your shed must be prepared first. Pick materials that match your climate and budget, and always use proper safety gear. Spray foam gives you superior sealing, while fiberglass batts are budget-friendly options. The right installation techniques are vital to get the best results.
This insulated space becomes your comfortable workshop, storage area, or hideaway in any season. Double-check your measurements, make precise cuts, and follow each step with care – you’ll see the results shine through.